A Pirate’s Treasure Chest of Learning

treasure chest

In the world of education, creativity knows no bounds. A simple shoe box, often discarded after serving its primary purpose, can be reborn into a treasure trove of learning opportunities. The allure of adventure and the thrill of discovery captivates the imagination of young learners.

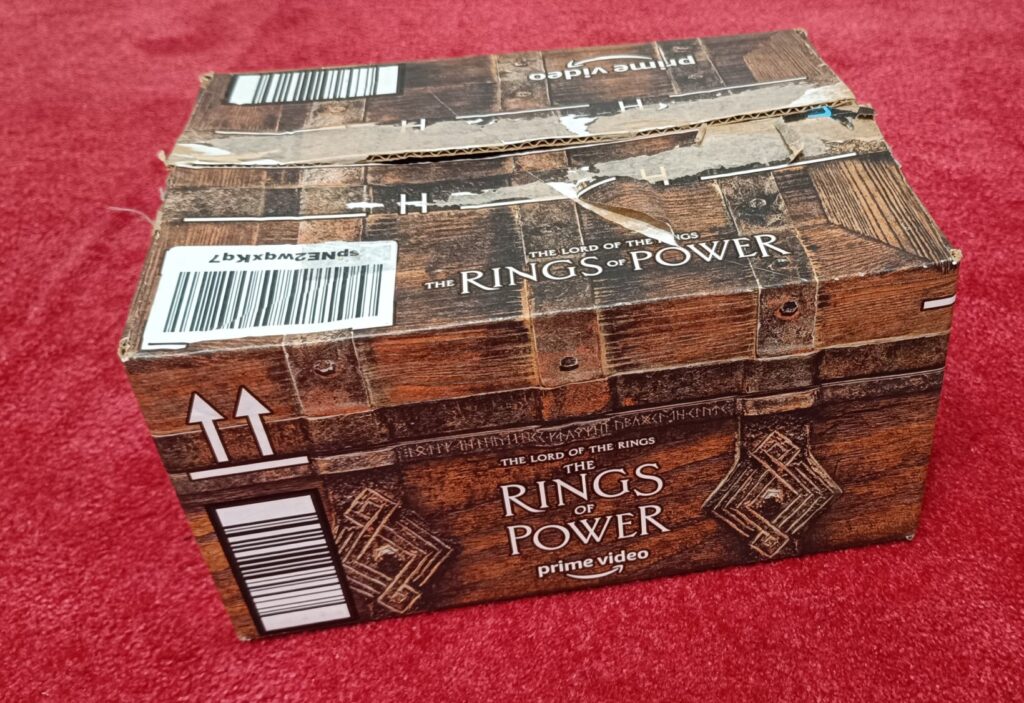
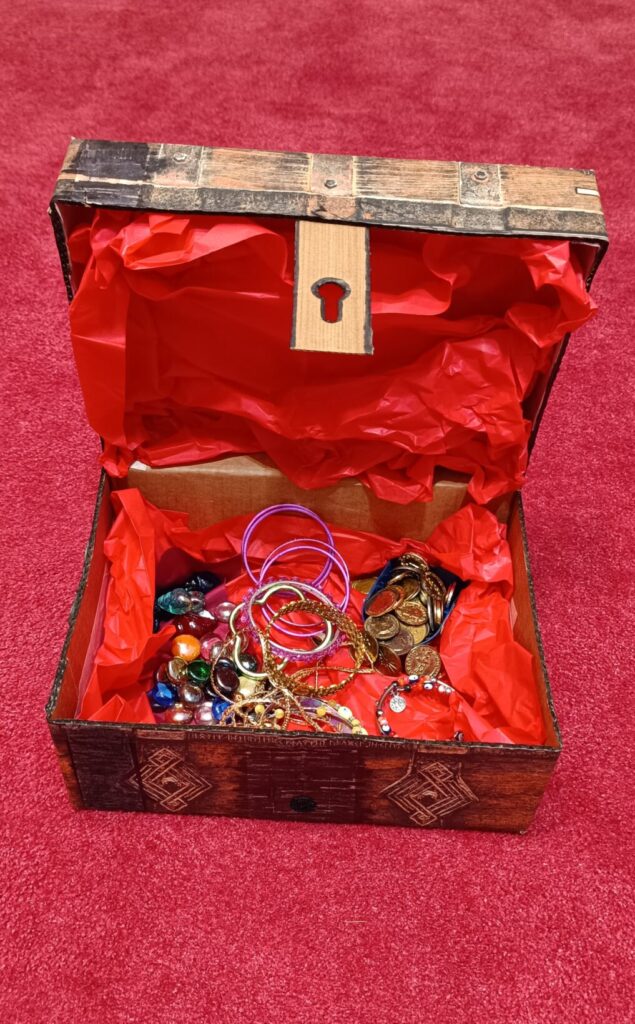
When I found this handsome box discarded I saw its many potentials! So I secured it with paper tape, reinforced it on the inside (with parts of another pizza box!), cut it in the middle, covered the parts which had letters on them, tried to imitate the style of the rest of the box with various matching paints, crafted a lock, and finally, lined the interior with red wafer paper. When my treasure chest was ready, it was time to put my treasure inside! Children’s jewellery, plastic or glass gems, lucky plastic coins gathered from vasilopita pies (vasilopita is a traditional Greek New Year’s Day bread, cake, or pie that contains a hidden coin) and any other trinket I could think of!

I will use my treasure chest with my 3rd graders, since there is much scope in their 1st and 2nd Units for a re-enactment of the lessons where the treasure chest is discovered by Kelly and then used by the pirates in Captain Cook’s crew!

Here is a map in imitation of the map in Lesson 1 of Unit 1: Treasure Hunt Map

and the bamboo leaves with the panda on them (like a puzzle) in Lesson 2: Bamboo leaves

For a pirate hat have a look at my ‘Ahoy mates!’ blog post here.

Have students make their own pirate treasure chest: this activity will not only add sparkle to the lesson but also encourage students’ fine motor skills and imagination as each one of them will create their own. Have students recycle (or rather, upcycle!) materials such as boxes, cardboard scraps, ribbons, strings, or any other embellishments in order to make a treasure chest for their “treasures.”


Transforming a shoe box into a pirate treasure chest not only engages students in a fun and hands-on activity but also opens the door to a wealth of educational possibilities:

Literacy and Phonics:

Hide letters or words within the chest, prompting students to identify and spell them correctly.

Creative Writing:

Encourage students to develop pirate-themed stories centred around the treasure chest. This activity fosters creative writing skills, expands vocabulary, and allows for imaginative expression.

Mathematics:

Introduce counting and sorting using the toy coins or jewels. Create math problems based on the number of treasures hidden in the chest. 

History and Geography:

Explore pirate history and geographical locations of famous pirate adventures. Incorporate maps and discuss the concept of buried treasures to tie the project to real-world historical contexts.

Teamwork and Collaboration:

Assign group projects where students work together to create a collective treasure chest. This fosters teamwork, communication, and collaboration skills.

Reward System:

Fill the treasure chest with small prizes, such as stickers, candy, or small toys, to reward students for exceptional work or good behaviour.


Unlock a treasure trove of educational opportunities through this tangible artifact!!!

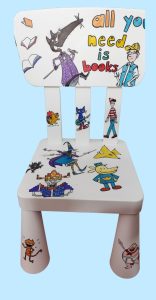
Making (and using) a storytelling chair

IMG 20240104 011341

Storytelling for kindergarten (and, of course, primary school) children is highly beneficial. Not only does it inspire imagination, but it’s also highly engaging. It captivates young learners’ attention, acts as a language booster, and ignites a love for literature.

Using puppets, props (even the simplest ones can have a tremendous effect on the little ones! – try pressing all your fingers to the front, using your hand as a beak and then engage in a dialogue with it), body language and animated voice can encourage imagination and creativity and foster social interaction: children empathize with characters and engage in discussions, developing, thus, their critical thinking, a much sought-after skill not only for their personal growth but also for their academic success. Sometimes nothing else is needed when telling a story other than imagination: creating mental pictures and getting the children physically engaged through movement can do the trick (‘imagine being the wind that blows the leaves off the tree, or being the leaf thrown out of the tree by the wind!’, ‘imagine climbing up the beanstalk, careful not to slip and fall, looking down as we climb’).

Finding the age-appropriate book for our students is of paramount importance. Books that contain simple language (or you can simplify it yourself as you read), and repetitive patterns are very helpful: fun aside, repetition can boost students’ confidence, consolidation of new vocabulary and sentence structures.

And how should you narrate (or read) a story? Standing or – better – sitting in the middle of a designated storytelling area is a good idea. A storytelling chair can serve as a focal point for teacher-student interaction during storytelling sessions, fostering a positive learning atmosphere. It can enhance engagement, create a sense of anticipation, and provide a comfortable and focused environment for children, making the storytelling experience more memorable and enjoyable.

I’ve had my eye (and set my heart!) on getting one – but then I thought: why not MAKE one? So I bought a plastic chair with ample writing space and got a pencil, a rubber and some permanent markers, and some days later … my storytelling chair was ready!!!

You can see the story of my chair unfold here:

Ways to use a strorytelling chair

Tell stories and repeat them often. Children feel more confident listening to stories when they know them inside out and know exactly what comes next.

When children become very familiar with certain stories invite them to sit on the storytelling chair and recount (or repeat) a part of the story. Anyone who sits in it becomes the storyteller with powers to entrance their listeners!

Have students identify another character on the chair. What would happen if the hero of the story met another hero (and became good friends with them?) – time for some critical thinking and communication development then!


Food for thought

How about you?

How would you use a storytelling chair?


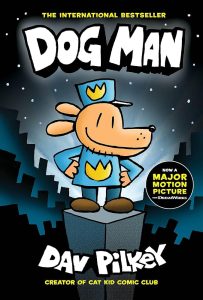
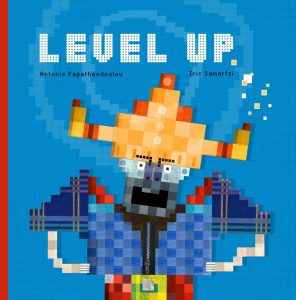
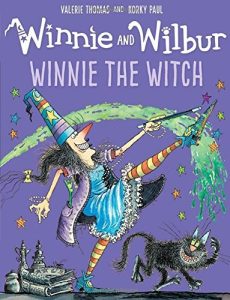
Can you find the stories that appear on my chair?

How many can you find?

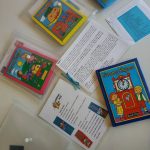
(here is something that will help you 😆 Books that appear on the storytelling chair)


How many have you used in your teaching?


Most importantly, have fun and enjoy the process yourself: approach storytelling with enthusiasm and joy. Your genuine passion for the story will be contagious, and the child will sense your enjoyment and engagement.


ba76d6077a18686f209b023336328b0c

Silly Walk Clock

Who doesn’t remember the wacky Monty Python’s “The Ministry of Silly Walks” sketch? Let me refresh your memory if you don’t:

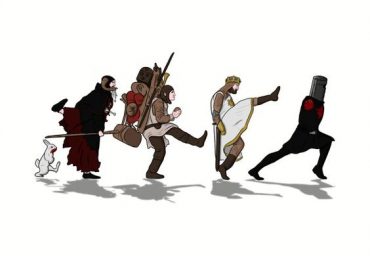
Mr Teabag – John Cleese- (one of the surreal comedy troupe Monty Python) is a bowler-hatted civil servant in a fictitious United Kingdom government agency entrusted with bestowing grants to those who develop Silly Walks. Throughout the sketch John Cleese is seen to walk in the most absurd, hysterically funny walks: these walks were the reason the sketch earned such popularity as to be rated 15th in the ‘Britain’s Top 50 Comedy Sketches’ list (for a full synopsis of the sketch see here).

And here is the sketch:


What great fun to practice reading these Silly Walks with your students ! 

What about practicing some of these walks and say which was sillier, the silliest of all etc. (great opportunity to use comparative and superlative forms…)


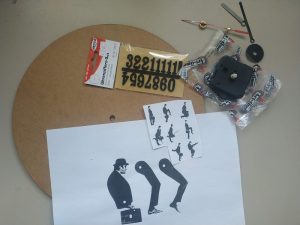
Now, I’ve made this clock (I love summer because I have more time in my hands to do all the things I cannot do during the school year…)

I used these things (template and instructions here)


And more instructions from these videos

Ministry of Silly Walks Clock DIYMinistry of Silly Walks Clock – Build

This is my version of the clock in action ( and my first attempt to make a video using time lapse recording ! )

And this is something I made to use with my students at school when we learn to tell the time!

Watch the Official Lyric Video of The Silly Walk Song:

Maybe it will inspire you too! 😉 

For more fabulous cartoons visit Pete Emslie’s blog, The Cartoon Cave

Using Nursery Rhymes at school: A reading project with a 4th grade class

I’ve always been interested in Nursery Rhymes for their multiple benefits, which so vividly David Gibson presented on various occasions (see Nursery Rhymes).

So, when I found these nicely illustrated little books on offer I bought 20 and started a reading project with a 4th grade class: every fortnight/week students would have to read a book, maybe listen to the CD which accompanied it. This CD was recorded with the help of my dear friend David who kindly read the Nursery Rhymes for us. There were 6 titles in the series and each packet also contained a leaflet giving some general, introductory information on Nursery Rhymes and some info on each Nursery Rhyme: when they were published, the story (if there is one) behind them, and the explanation of some unknown words. Every child had to present one of the Nursery Rhymes they liked- either recite it or play it or sing it, either alone or with another classmate. Every week I would choose a Nursery Rhyme and find a worksheet on it from the big variety there is on the Internet, or make my own, and teach the corresponding rhyme or song.

We also danced to the Grand Old Duke of York, following the pattern  of this video:

Folk Dance – Grand Old Duke of York (England)

Here is a short presentation of the things we did throughout the year:

Using Nursery Rhymes at school

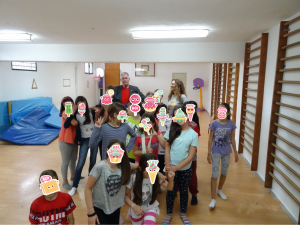
It was a very enjoyable project. All the students were involved with enthusiasm (even boys, whom I expected to be more reluctant!) and had lots of fun! At the end of the school year we presented ‘The grand old Duke of York’ and other Nursery Rhymes to the whole school and our special guest, Mr David Gibson!


I presented the project (actually complemented David Gibson’s wonderful talk with this educational example) on various occasions (TESOL Macedonia-Thrace, TESOL Greece, Ekadeve) and it received a warm welcome by colleagues! (interview)

You don’t have to buy books, of course, to make this project, since there are so many things you can find on the Internet and do with Nursery Rhymes!

You can find lots of Nursery Rhymes here:

The Project Gutenberg EBook of The Big Book of Nursery Rhymes, by Various

Ideas to Use Nursery Rhymes in the Classroom

Reading & Recitation

Nursery rhymes are a great way to build some individual or group reading:  they can be used as a warm-up at the beginning of a lesson, as a closer at the end of a lesson or just something to break up the monotony of the traditional lesson. The teacher can work with the students to memorize the rhyme or assign it as homework to memorize at home, either individually or in small groups. S/he can also divide the poem line-by-line and assign each student one line of the poem to memorize. Then they can perform the rhyme in small groups with each student responsible for one line.

Illustration & Crafting

Once you read the nursery rhyme as a class and go over new words, ask the students to illustrate the nursery rhyme, letting your creative students express themselves! Then, display the illustrations on the walls to bring a sense of pride and personality to your classroom!

Here’s an incredible resource on the State Library of Louisiana which provides a whole list of free  mini books to download of the nursery rhymes I found!

Acting It Out & Tickling

Acting out a nursery rhyme is best used in addition to reciting it. The TPR (Total Physical Response) method not only gets students up and out of their desks, but it also helps with memorization and encourages a better understanding of the words. Some nursery rhymes have well-known movements attached to their lyrics (‘Incy-wincy Spider’) : you can use the established gestures or create your own for just about any nursery rhyme.

Here’s an example of the Nursery Rhyme with actions: ‘The Grand Old Duke of York’

Children love to anticipate the tickling and that’s what these rhymes are all about (children just love ‘This Little Piggy Went to Market’ and such).

Have a look at Round and round the garden – three tickle rhymes!

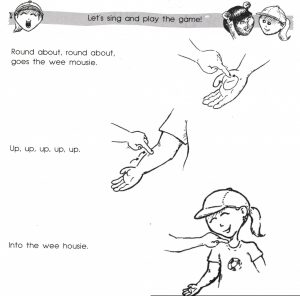
And do you remember the game in Magic Book 1 (Unit 2The Story of Bella the Cat, Lesson 1)

‘Round about, round about,

Goes the wee mousie.

Up, up, up, up,

Into the wee housie!’

It was a tickling rhyme!

Counting

Some Nursery Rhymes help to teach numbers and counting, either normal upwards counting or downwards counting (‘One Two Three Four Five, once I caught a fish alive…’). Some songs are not about counting but they do have a progressive nature, following some kind of sequence or pattern (‘ Old McDonald Had a Farm’, ‘Hokey Cokey’).

Here’s a clip (the first in the video) of the counting rhyme ‘Ten green bottles’.

Games & Dancing

Some Nursery Rhymes can be regarded as playground songs (including skipping, hopscotch, ball-games) and selection or counting-out rhymes such as ‘One Potato, two potatoes’), or can be danced in a ring (‘Here We Go Round the Mulberry Bush’) or as a folk dance.

‘One Potato, two potato’ is especially loved in Ireland (given the importance of potatoes in Irish cuisine!) Here are the game instructions

Screencast-O-Matic

Screencast-O-Matic is a free online screen capture tool. This tool records a designated area of your screen as well as audio and webcam input. You can record your screen, your webcam, or both. Recording options are simple and straightforward. The tool lets you adjust the size of the recording window depending on resolution. Free users can trim recordings, write captions, and add a limited number of music tracks before publishing.

Screencast-O-Matic helps you focus on what matters – your students. As a teacher you can create tutorials or lessons for classroom instruction and share these videos with students. The tool is very compatible with the principles of the flipped classroom (a new pedagogical model, according to which the traditional way of teaching (lesson at school – homework at home) is reversed: the lesson is delivered from the teacher through videos or podcasts s/he has made and which s/he has posted on the internet (or in the e-class / e-me). Then the students watch the new lesson on the computer or tablet and learn on their own, at their own pace. The next day in the classroom (even via WebEx) the comprehension of the lesson is checked, the questions are answered and the respective tasks and exercises are done in groups. This allows you to use your in-class time more efficiently.

Screencast-O-Matic can help you engage students with video conversations: you can have them record their ideas or thoughts about a classroom topic and communicate them with you or their classmates. You can also have the students create their own videos in projects and assignments, unleashing, thus, their creativity. They can even create their own how-to video, or partner with other students to create a group project.  This way the students take ownership over their learning and gain a deeper understanding of their knowledge!

The possibilities are endless!

Here’s a tutorial (in Greek…) about Screencast-O-Matic:

Screencast-O-Matic tutorial


Google Slides: vocabulary on a text at a click of a button

Google Slides are a great way to do so many things!

Why use them (and not PowerPoint, for example…) ?

Because they provide consistency, they can be easily accessed and shared and are ideal for group work. There are some minor downsides (fewer template choices, a gmail account is required), but the possibilities are endless!

You can give free rein to your imagination and creativity and create virtual worlds. You can create classrooms, libraries, escape rooms … practically, any scene!

Here’s an example:

What about a ‘room’ which recreates a scene (here: ‘Goldilocks and the 3 bears’) with active links on some objects of the scene? Or a classroom (with a teacher showing various videos and/or resources on the Letter Aa?)

But this is not the case here!

In this case I used a Google Slide Presentation to present the vocabulary of a text by immediately connecting the word to its meaning (sometimes reinforced with pictures) and its pronunciation. Magical, right?

Here’s the how-to video:

https://www.youtube.com/watch?v=jywXOkP9PMA

And here’s the end product (4th grade, Unit 5, Lesson 2, Βιβλίο Μαθητή):

Christmas in Britain

and another one (6th grade, Unit 3, Lesson1, Pupil’s Book), containing the pronunciation of the words as well:

Unit 3, Old Creatures and new

The Famous Portaits Museum (feat. The Mona Lisa and others to follow)

I created a speaking image of the painting The Mona Lisa (#monalisa) with #chatterpix

My plan is to have more talking portraits (of both men and women) in a virtual museum made by students (probably 6th graders) this time!

The tool I used to make the museum is emaze.

What is emaze?

emaze is an online, web-based presentation creator that can be used to easily build and edit visually compelling and engaging presentations on any personal computer. emaze presentations don’t look like the typical PowerPoint presentations you see every day. If you’re familiar with Prezi,some emaze presentations might seem similar (they can involve movement) but you can always create traditional presentations that are more akin to a PowerPoint. The plus feature in emaze is the ability to easily embed media of any kind, including HTML widgets. The ability to embed media of any kind is also an enormous benefit and allows students to integrate projects they’ve created on a wide variety of apps and sites.   

Once you’ve finished creating your presentation, you can download it in a variety of formats (in the Pro version), or share it out with a link, embed code, or through social media.

When you start using emaze you’ll be able to choose from one of their many predesigned templates.  Or if you’d rather start from PowerPoint, you can quickly import your pre-made PowerPoint presentation and convert it into any emaze template that you’d like.

Take a look at a short tutorial from the emaze team so you can see what the platform looks like in action:

https://www.youtube.com/watch?v=9DMcpXms_HU&feature=emb_logo

(adapted from http://www.edtechroundup.org/reviews/emaze-create-share-and-explore-online-presentations)

Here is my Famous Portraits Museum emaze:

https://www.emaze.com/@AOTOLWQLQ/famous-portraits

louvre

Art time: Mona Lisa

La Gioconda, which is also called the Mona Lisa, is the most famous painting in the world. Each year, millions of visitors throng to see the painting in one of the Louvre Museum’s largest exhibition rooms. Her name and image have been reproduced on every continent on coffee cups and T-shirts, in adverts and films, on the Internet, and on the facades of restaurants and beauty salons. Wherever we are and whatever we are doing-whether we are on a street corner, opening a magazine, or turning on the television-, La Gioconda’s smile is omnipresent.

From the book What’s so special about Mona Lisa? By Delieuvin V. & Tallec O.

What would Mina Lisa tell us herself about her exciting life if we could just hear her famous painting in the Louvre Museum?

Well, come closer… listen…

(The script was written by Doulgeri Mary, and the image became a talking image with the help of Chatterpix!

What is ChatterPix?

ChatterPix is an app that converts pictures of inanimate objects into pictures that talk! All you do is snap a picture, draw a line to make it talk, and record your voice! ChatterPix can be used to make silly greetings, playful messages, and creative cards. In the classroom, ChatterPix can be used as a way for students to take pictures of their work and record information about it! A student’s ChatterPix can be emailed, sent to YouTube, or saved on a device. Teachers can have students save their ChatterPix creations in the camera roll on an iPad to review later.

Here is a guide of how to use it:

http://chatterpixworkshop.weebly.com/uploads/5/1/5/8/51581143/chatterpix_howto.pdf

If you want to have a look at or use the script of Mona Lisa, here it is:

Mona Lisa


We built this city!!!

What with all the technology and the digital tools we use I’ve come to appreciate the simple, crafty activities we do in the classroom…

Here’s a craft that we can start in D and could evolve into a communicative activity in E and St classes!

We can start it in D class, when we have taught the places / buildings in a village/town/city (Unit 3, Lesson 2, My city). The students bring an empty carton of milk (or an empty packet of biscuits) and glue a piece of paper on it (A4). On the piece of paper they can each draw the building/shop they like.

For our project we used this template so that the buildings/shops would be of a specific size and look homogenous on our town. https://drive.google.com/file/d/1_D7RFW1fAt_pHGnvrM3z9C1gnRvio49a/view?usp=sharing

We can either use a big cardboard sheet on a desk or a big piece of a Styrofoam sheet. Then we put everything the students created and we ‘design’ our city: where the streets, the buildings, the parks (and anything else the students’ imagination would deem necessary!) would go/ any trees, inhabitants, etc they would bring and add in their city.

We can then use our ‘city’ in E class (Unit 3, Lesson 2 ‘How can I get to …?’) and St class (Unit 5, Lesson 2 ‘Transportation’) for actual 3D practice: in pairs the students have to ask for and give directions to a specific place in the city. After students have studied the expressions for asking for and giving information 

(here’s a useful handout: Asking-for-giving-directions.pdf)

a dialogue like this can ensue:

-By car or on foot? (One of the students holds a car and a figurine of a person. The other student has to choose the transportation means)

-Goodmorning. Could you show me the way to… (pointing to a shop/building)?

-Go down (… street – the students have given names to the streets) and take the (second) turning on the (right) into ….Street.

-(The other student follows the directions)

-The (…) is opposite/between/… You can’t miss it!

-Thank you very much!

-You’re welcome!


The gains from this activity are manifold: apart from being fun and interactive, students get an actual sense of direction, not to be acquired by any activity on a piece of paper (usually a map).  

Have a look: