louvre

Art time: Mona Lisa

La Gioconda, which is also called the Mona Lisa, is the most famous painting in the world. Each year, millions of visitors throng to see the painting in one of the Louvre Museum’s largest exhibition rooms. Her name and image have been reproduced on every continent on coffee cups and T-shirts, in adverts and films, on the Internet, and on the facades of restaurants and beauty salons. Wherever we are and whatever we are doing-whether we are on a street corner, opening a magazine, or turning on the television-, La Gioconda’s smile is omnipresent.

From the book What’s so special about Mona Lisa? By Delieuvin V. & Tallec O.

What would Mina Lisa tell us herself about her exciting life if we could just hear her famous painting in the Louvre Museum?

Well, come closer… listen…

(The script was written by Doulgeri Mary, and the image became a talking image with the help of Chatterpix!

What is ChatterPix?

ChatterPix is an app that converts pictures of inanimate objects into pictures that talk! All you do is snap a picture, draw a line to make it talk, and record your voice! ChatterPix can be used to make silly greetings, playful messages, and creative cards. In the classroom, ChatterPix can be used as a way for students to take pictures of their work and record information about it! A student’s ChatterPix can be emailed, sent to YouTube, or saved on a device. Teachers can have students save their ChatterPix creations in the camera roll on an iPad to review later.

Here is a guide of how to use it:

http://chatterpixworkshop.weebly.com/uploads/5/1/5/8/51581143/chatterpix_howto.pdf

If you want to have a look at or use the script of Mona Lisa, here it is:
Mona Lisa


We built this city!!!

What with all the technology and the digital tools we use I’ve come to appreciate the simple, crafty activities we do in the classroom…

Here’s a craft that we can start in D and could evolve into a communicative activity in E and St classes!

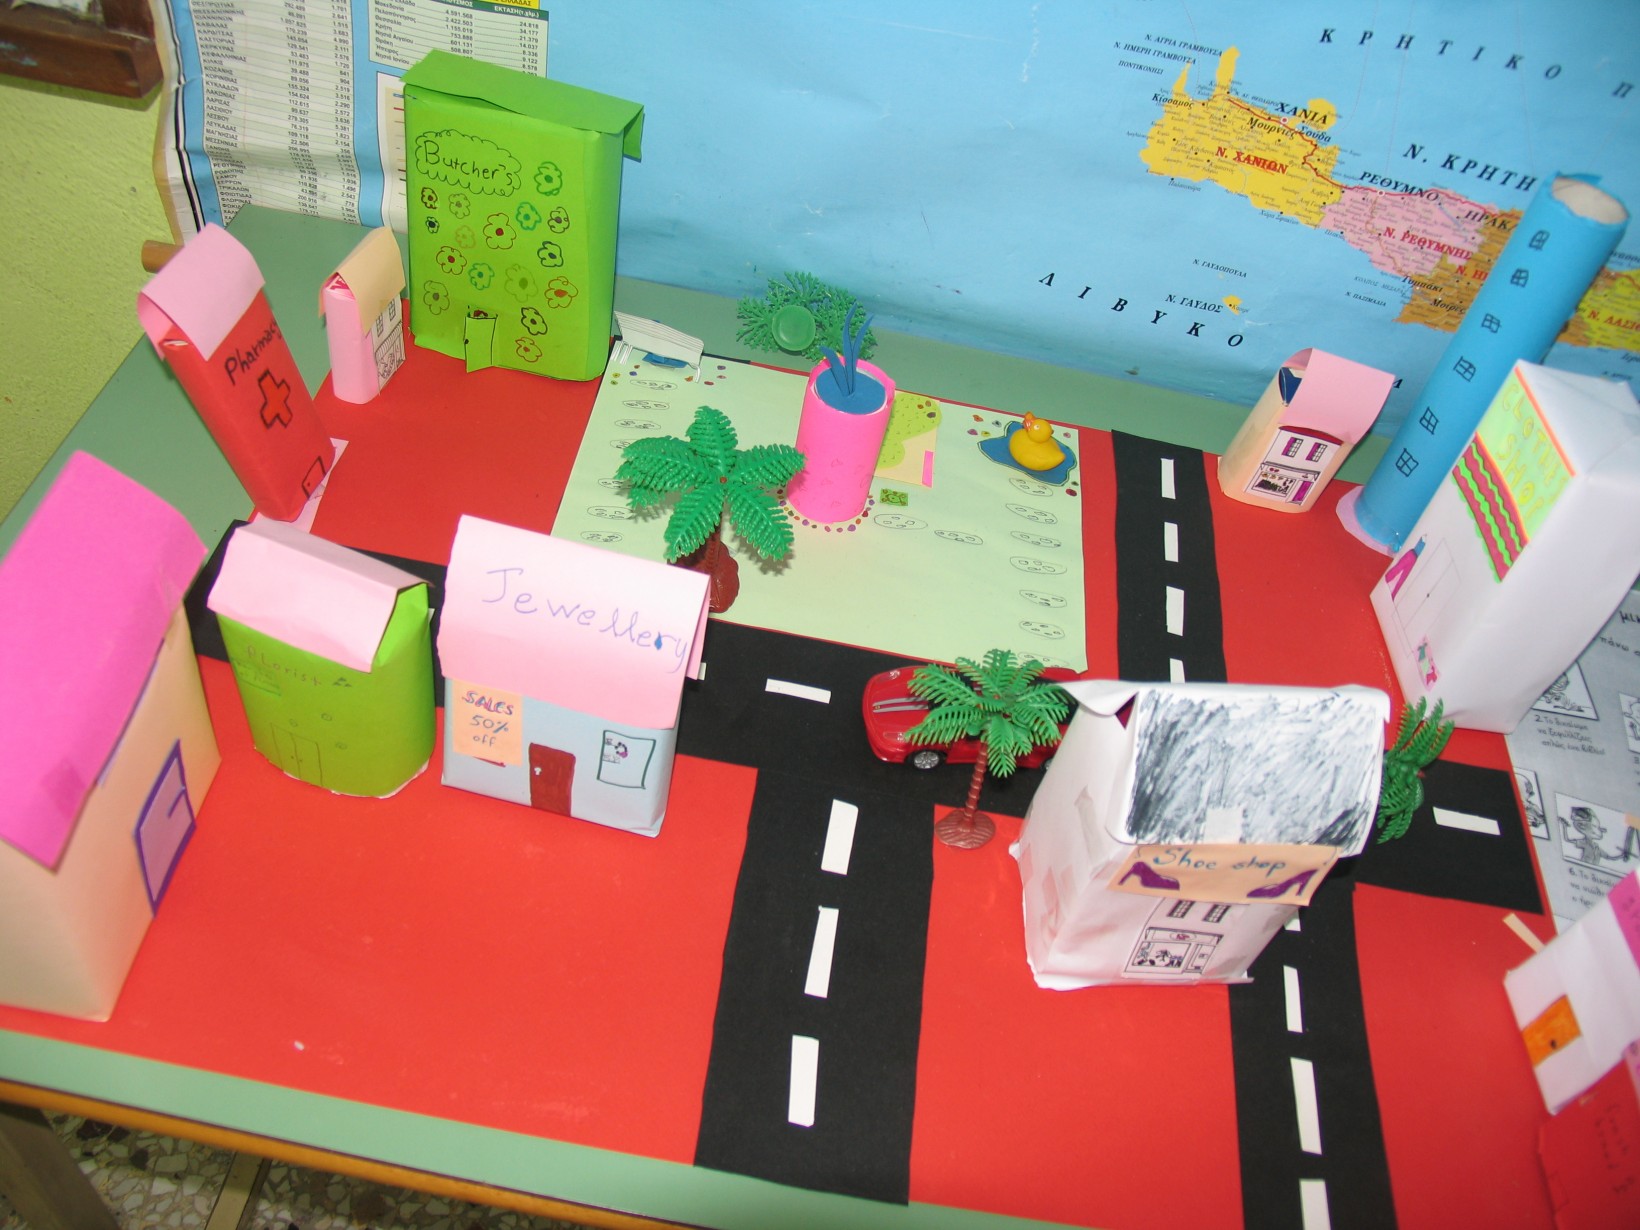
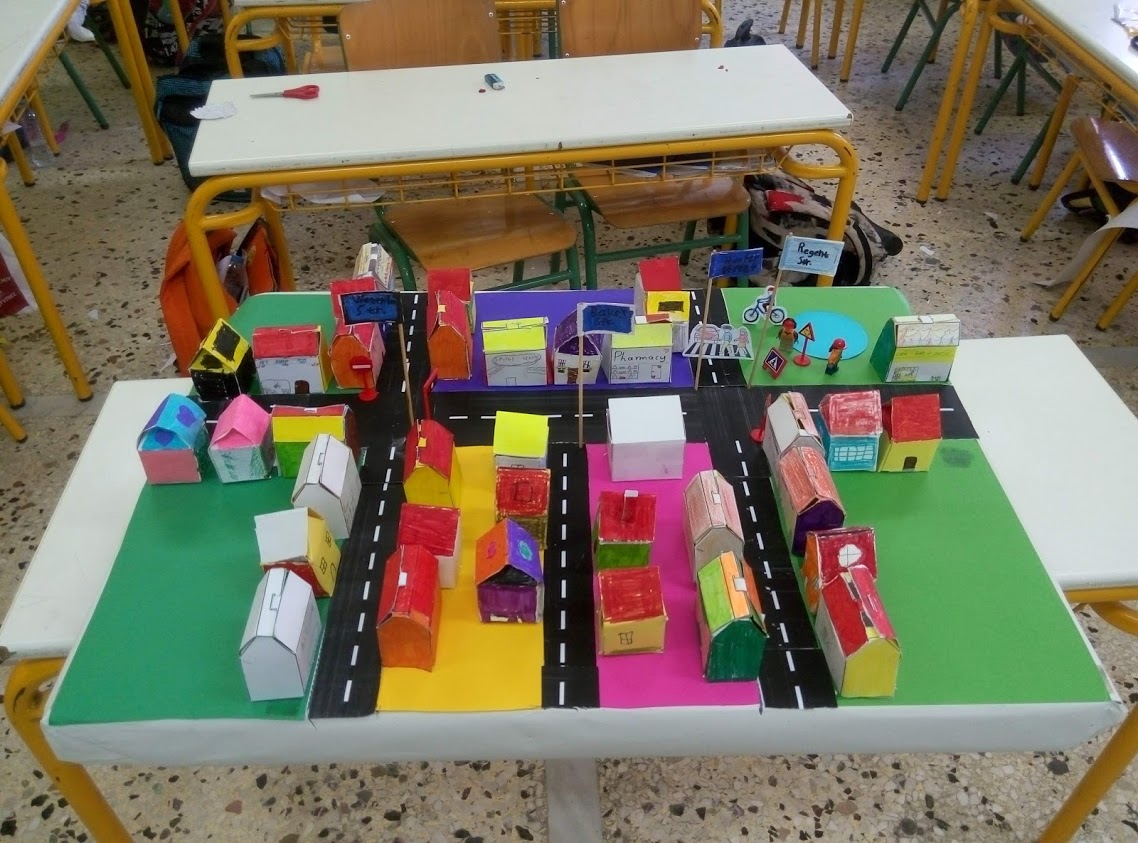
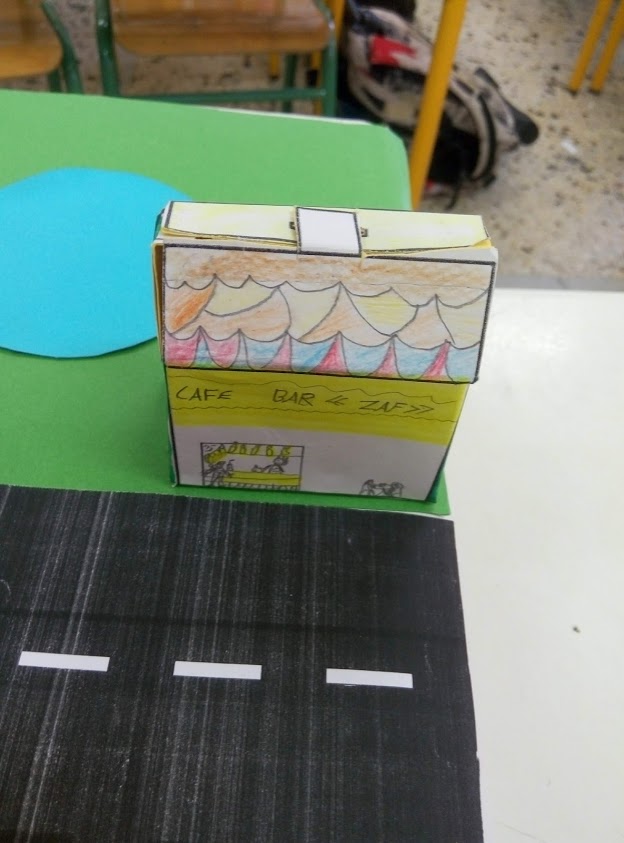
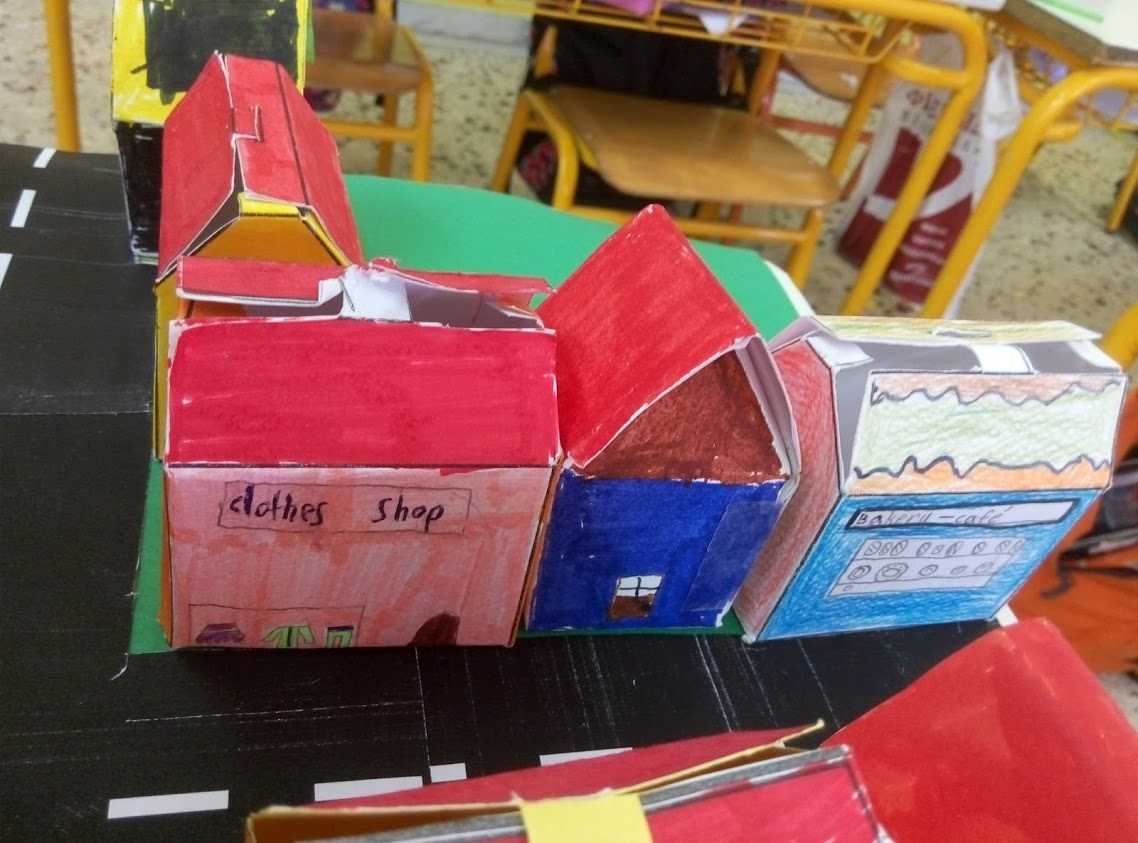
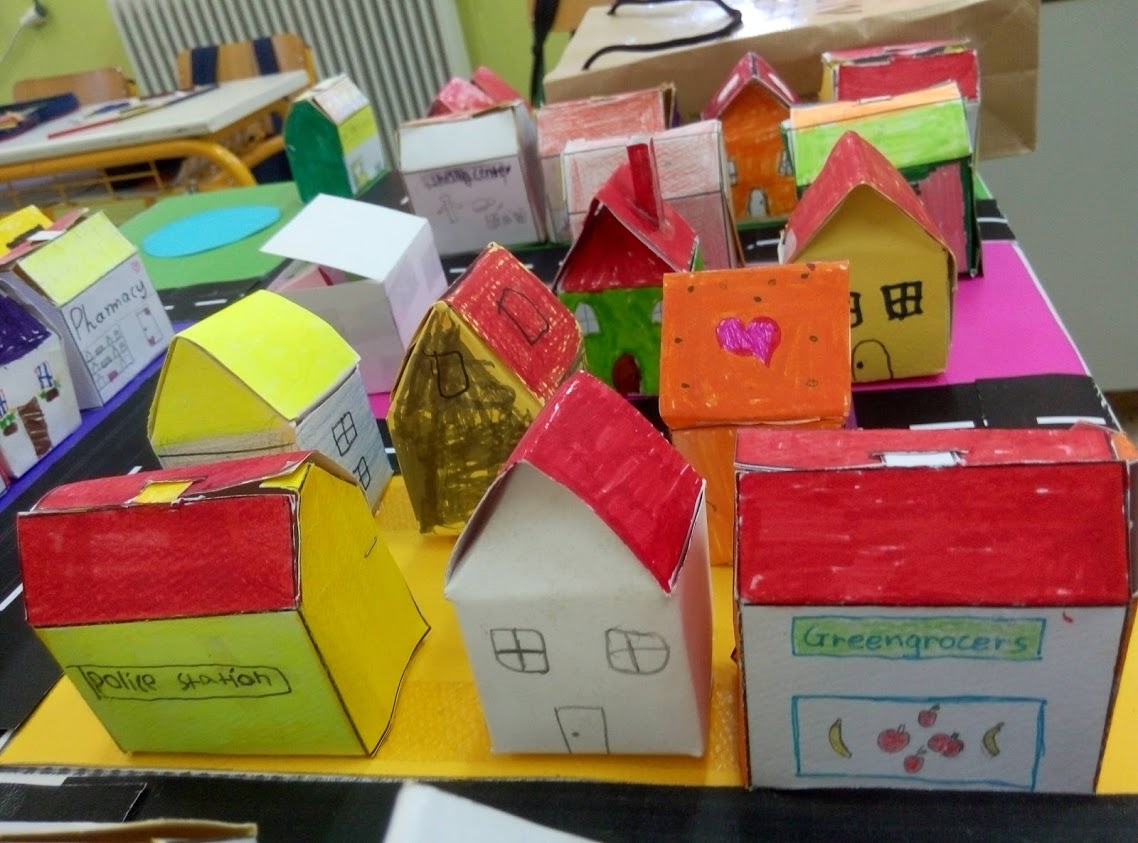
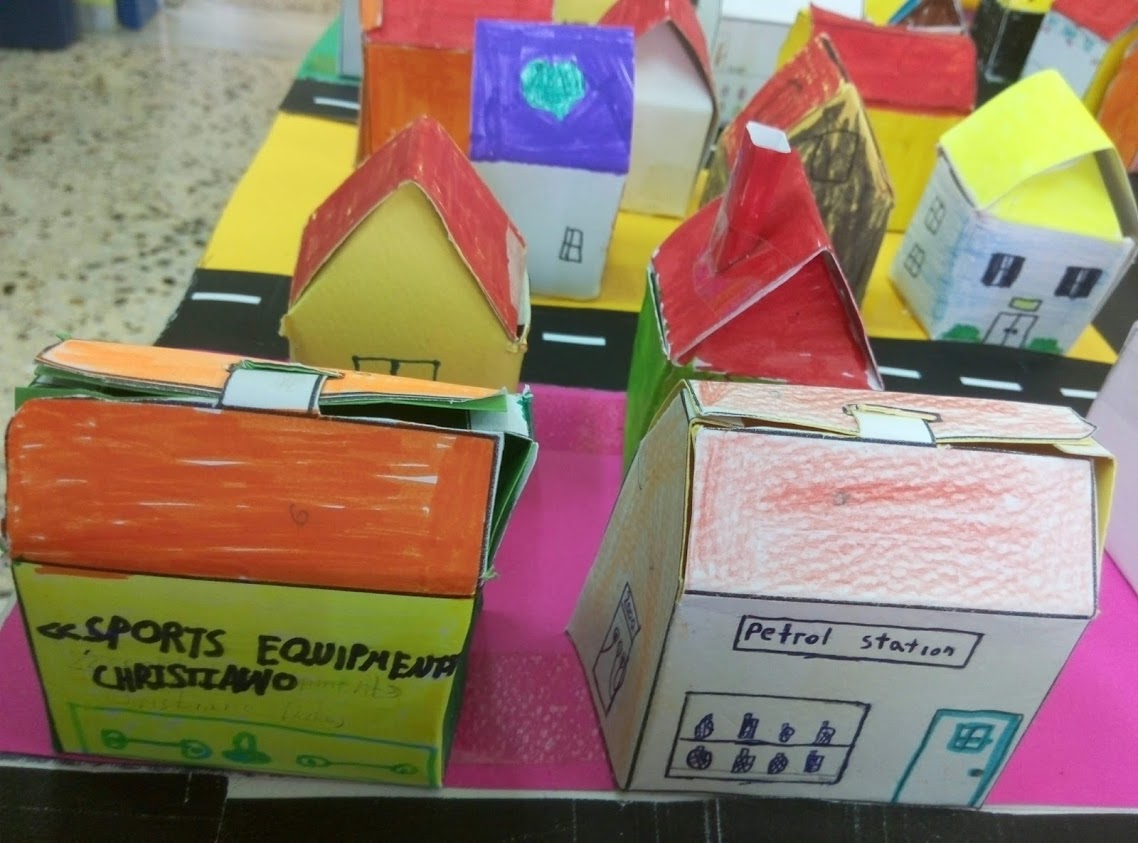
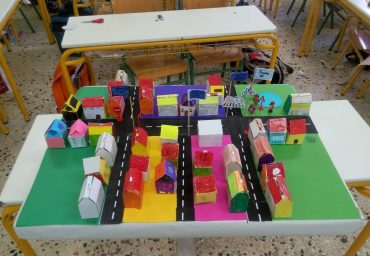
We can start it in D class, when we have taught the places / buildings in a village/town/city (Unit 3, Lesson 2, My city). The students bring an empty carton of milk (or an empty packet of biscuits) and glue a piece of paper on it (A4). On the piece of paper they can each draw the building/shop they like.

For our project we used this template so that the buildings/shops would be of a specific size and look homogenous on our town. https://drive.google.com/file/d/1_D7RFW1fAt_pHGnvrM3z9C1gnRvio49a/view?usp=sharing

We can either use a big cardboard sheet on a desk or a big piece of a Styrofoam sheet. Then we put everything the students created and we ‘design’ our city: where the streets, the buildings, the parks (and anything else the students’ imagination would deem necessary!) would go/ any trees, inhabitants, etc they would bring and add in their city.

We can then use our ‘city’ in E class (Unit 3, Lesson 2 ‘How can I get to …?’) and St class (Unit 5, Lesson 2 ‘Transportation’) for actual 3D practice: in pairs the students have to ask for and give directions to a specific place in the city. After students have studied the expressions for asking for and giving information 

(here’s a useful handout: Asking-for-giving-directions.pdf)

a dialogue like this can ensue:

-By car or on foot? (One of the students holds a car and a figurine of a person. The other student has to choose the transportation means)

-Goodmorning. Could you show me the way to… (pointing to a shop/building)?

-Go down (… street – the students have given names to the streets) and take the (second) turning on the (right) into ….Street.

-(The other student follows the directions)

-The (…) is opposite/between/… You can’t miss it!

-Thank you very much!

-You’re welcome!


The gains from this activity are manifold: apart from being fun and interactive, students get an actual sense of direction, not to be acquired by any activity on a piece of paper (usually a map).  

Have a look: 

Visualising tenses

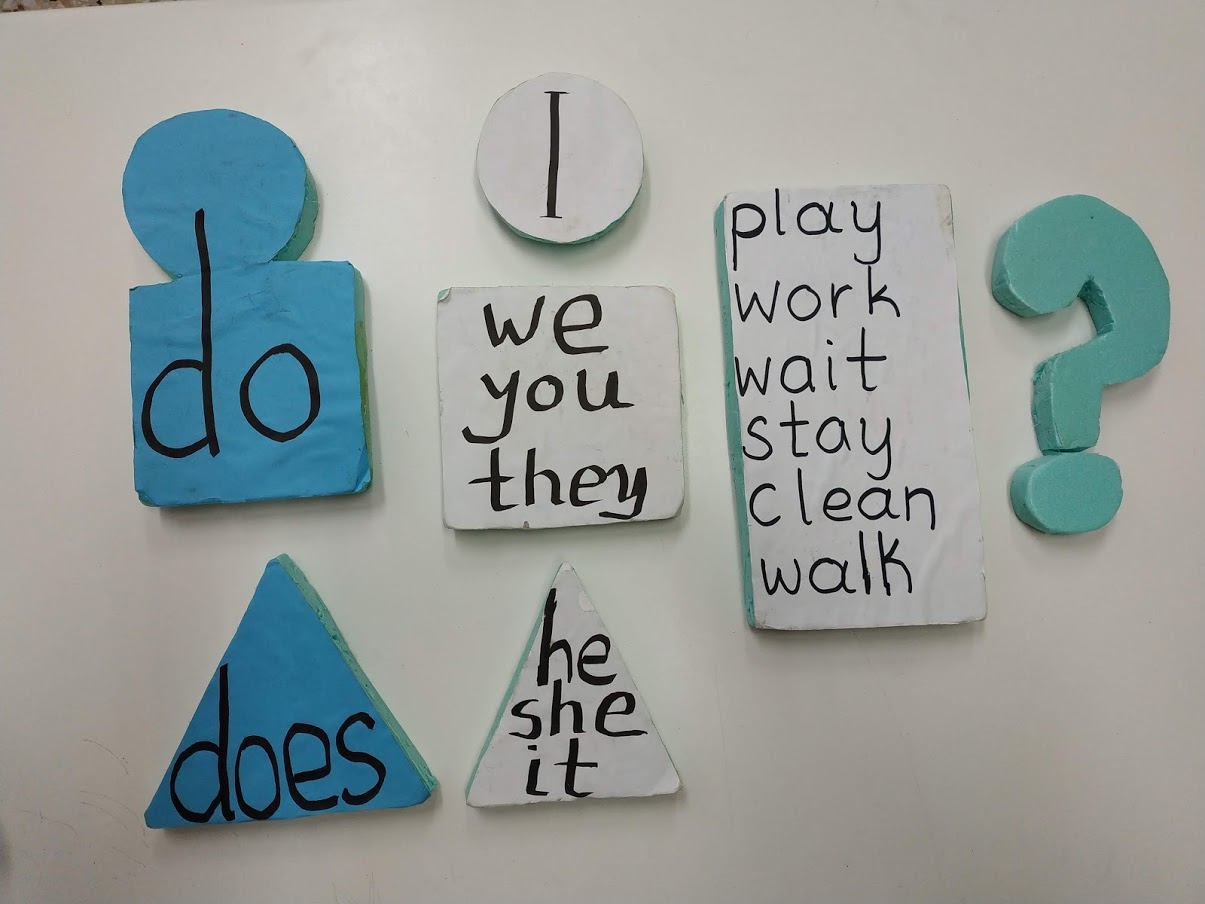
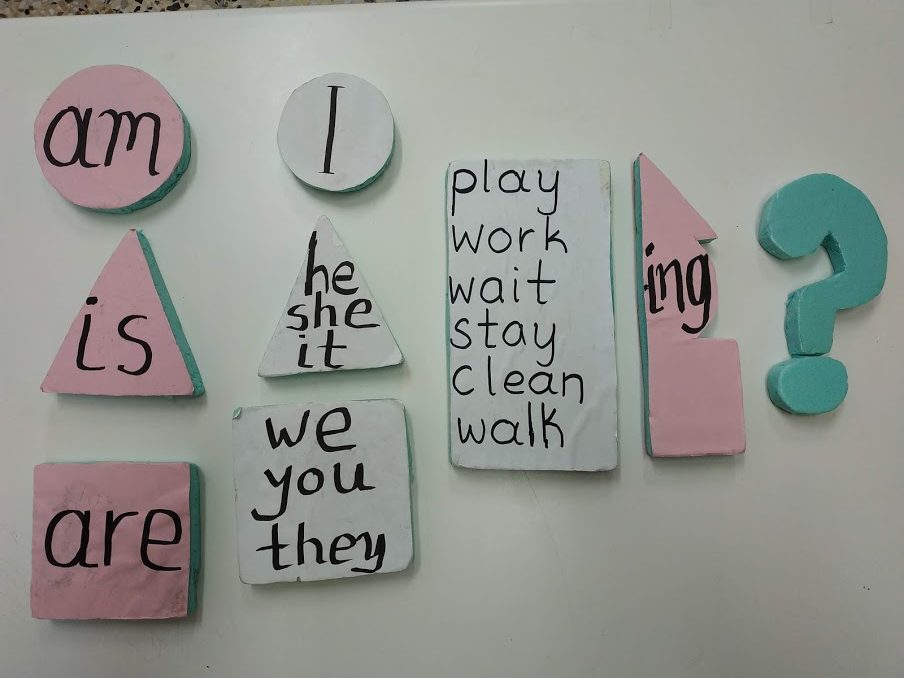
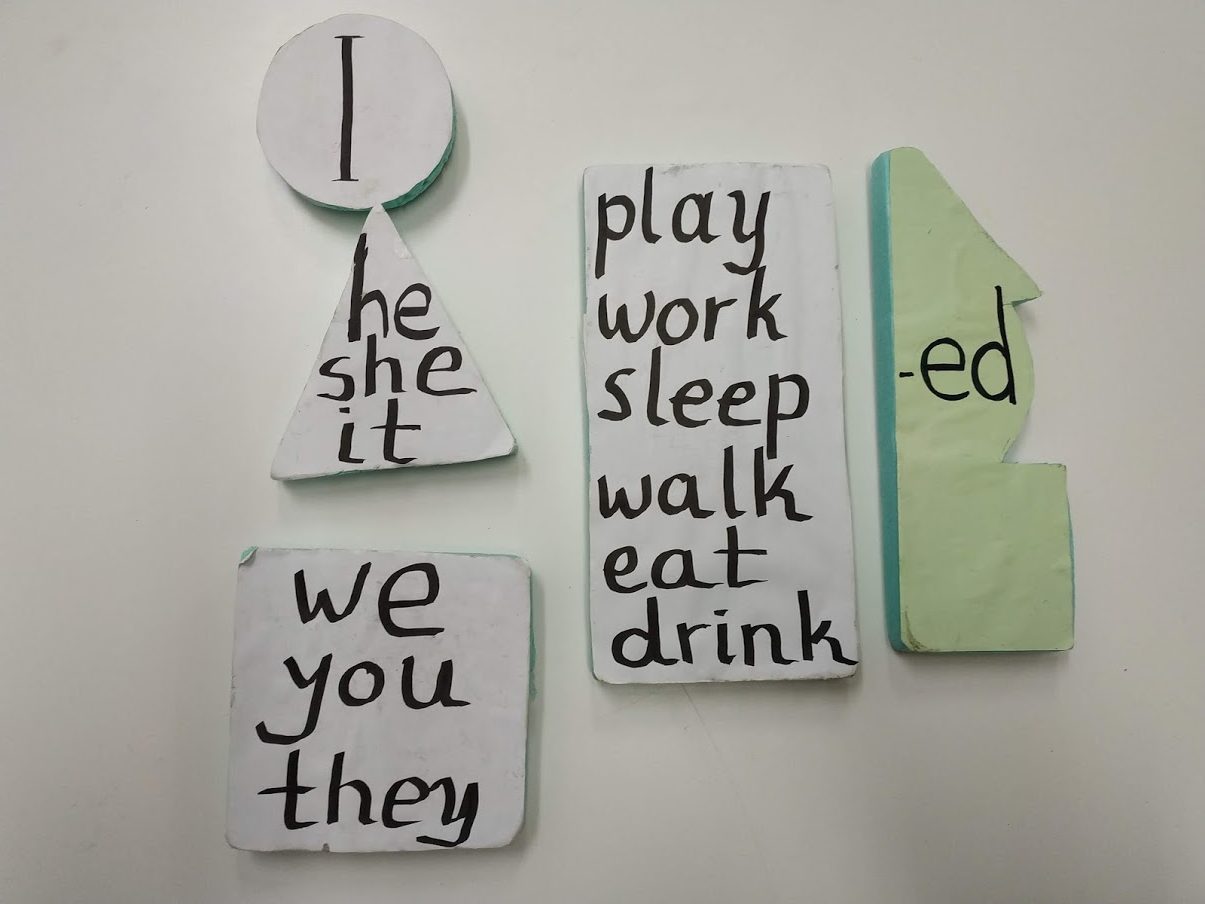
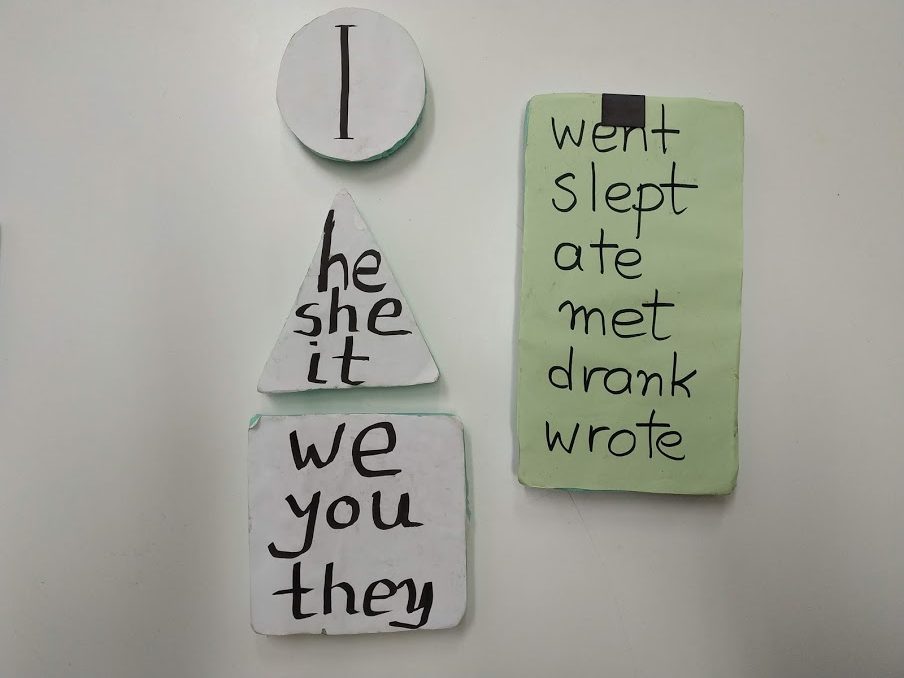
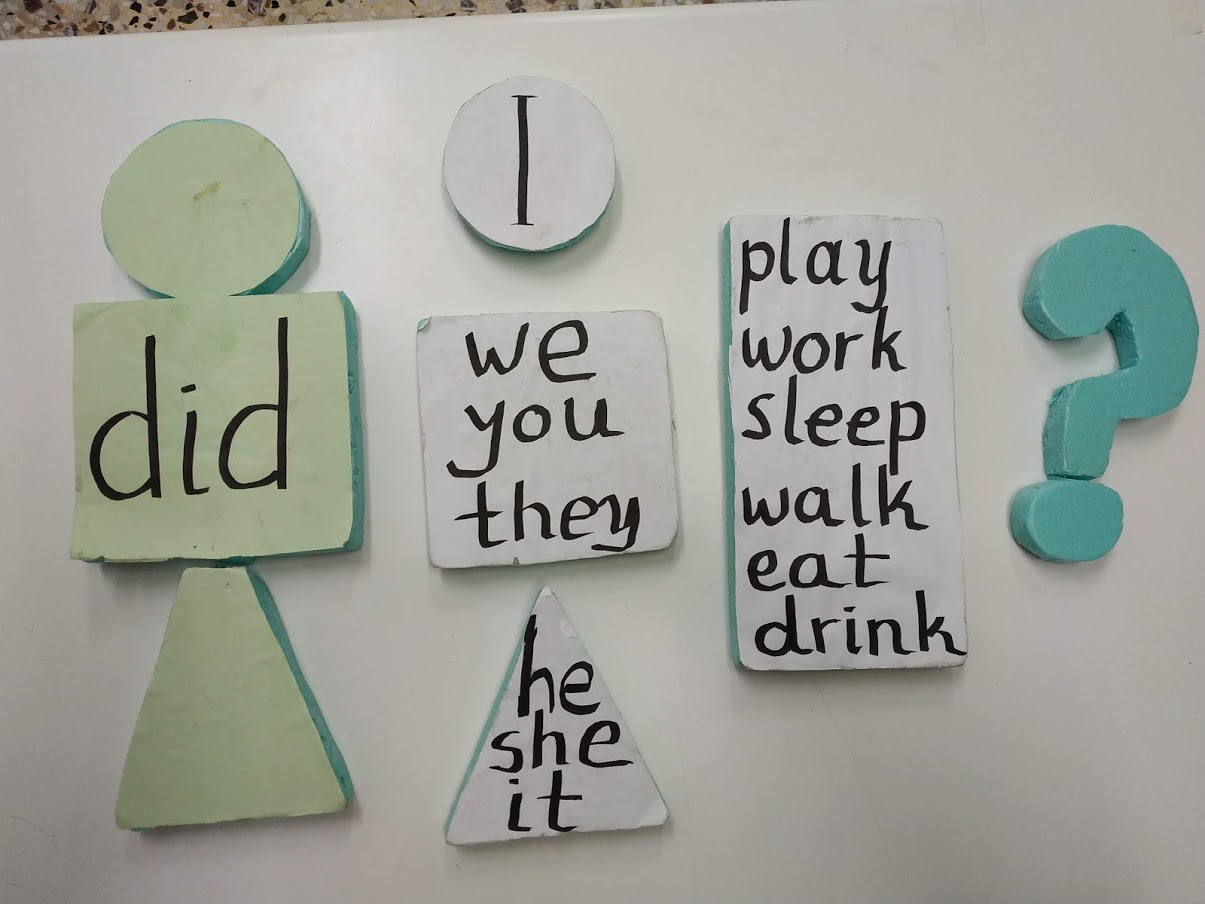
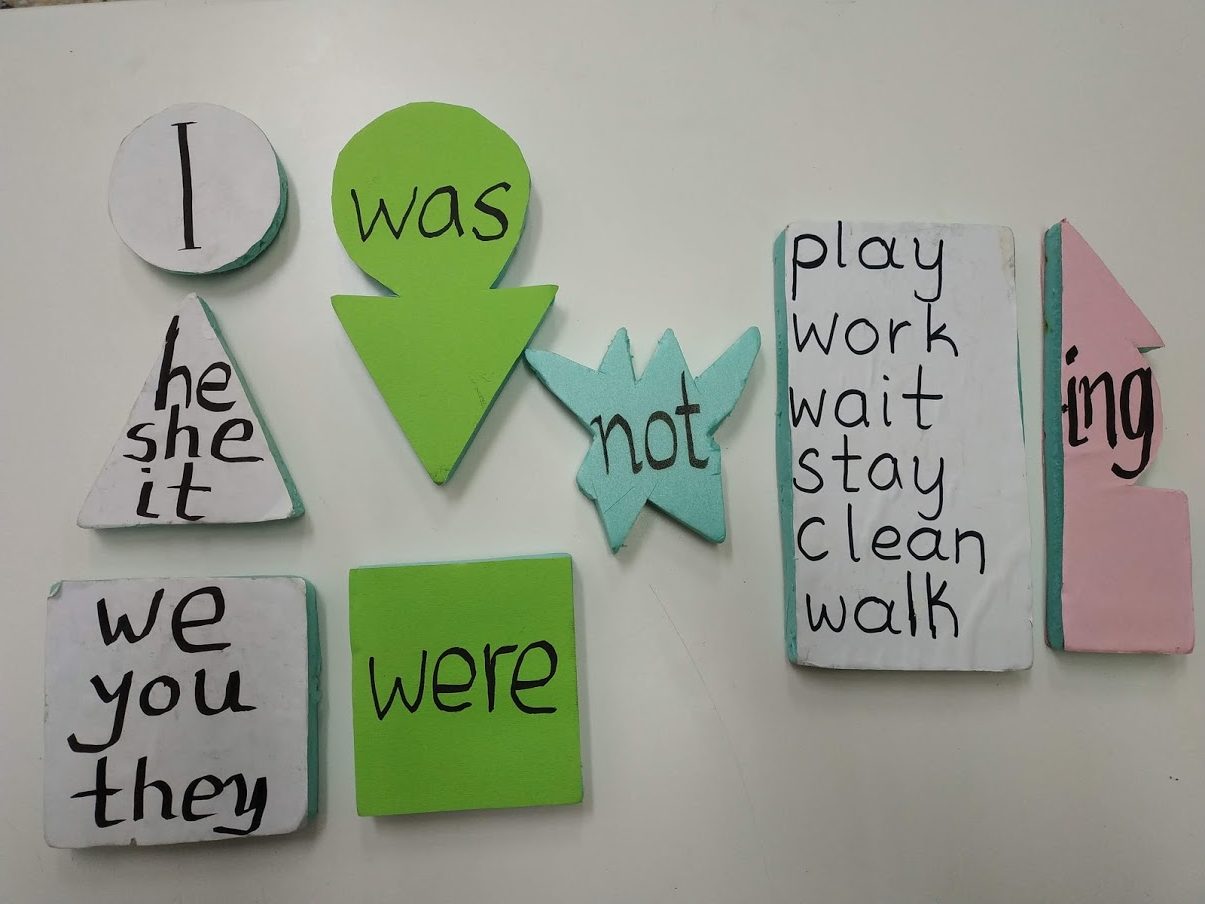
Following the advice of my fellow teacher (now a pensioner!) Evi K., I created this imaginative way to help students remember the 4 basic tenses of the English Language, namely the Simple Present, the Present Continuous, the Simple Past and the the Past Continuous. 

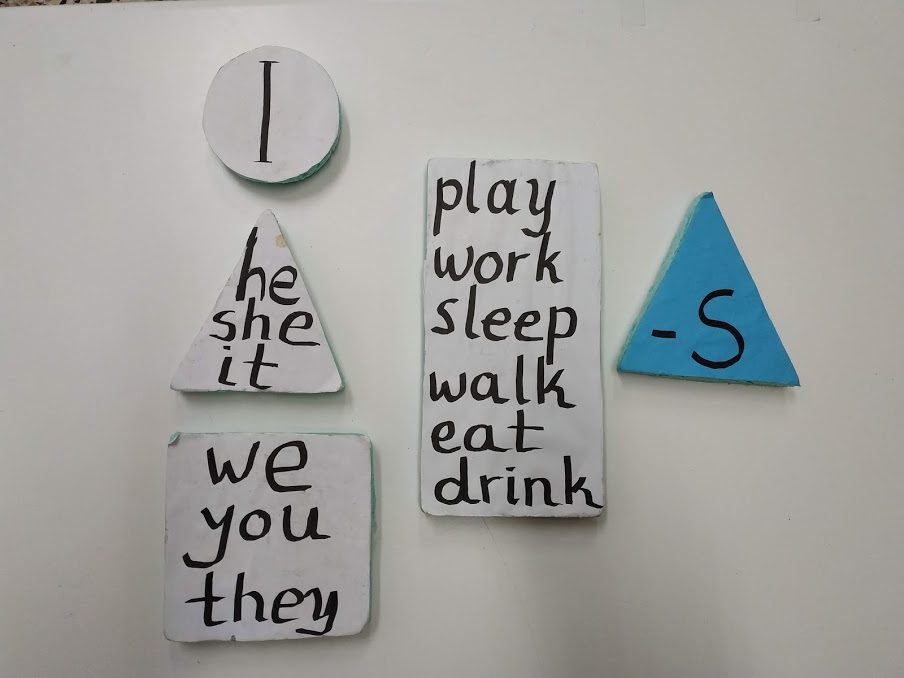
The implementation of the plan is quite easy: you need a large flat piece of Styrofoam, some pieces of paper, some adhesive magnetic rolls, and, of course, a large magnetic board, coupled with some patience and skill in cutting the Styrofoam to the desired patterns.

The rationale behind the craft is to help students visualise the formation of some of the most basic tenses, namely the Simple Present, the Present Continuous, the Simple Past and the Past Continuous. Students, especially those who are strong in visual-spatial intelligence (cf. Gardner’s Theory of Multiple Intelligences) will be able to recognize patterns easily and, thus, memorise the tenses.

The use of certain shapes also helps towards the memorisation of the conjugation of verbs in those tenses (for example the triangle of the third singular person helps students associate it with the –s ending).

Have a look:


Tenses

Having been teaching for many years now and seeing the anxiety of the students and the uncertainty in the use of tenses I decided to give the children a concisetable of all the tenses of the English language as I understand them in my mind. I hand them the photocopy at D class and tell them to keep it forever! (Of course, this is not always possible and next time I always need to re-photocopy some for the forgetful or for those who don’t have them ‘because my mum threw it away!’ 😆 )
So I tell them “I’m giving you a ‘crib sheet’ and I let you use it until you no longer need it!”
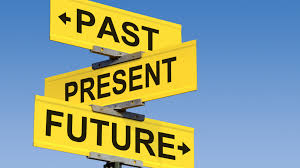
I divided the tenses into three broad categories: the times of the Past / Present / Future. Present Perfect tenses (Simple and Continuous) fall between the past and the present, as in many cases the action they describe began at some point in the past and either continues until now or we can see the results now. Future tenses form a pyramid with the top of the pyramid (Simple Future) being a decision of the moment, something more uncertain that it will happen. The more we move towards the base the more certain the action to happen is.
In each tense I have put the most basic elements of their formation, keywords and schematic representations. The fact that it is on one page helps students to gain a broader understanding of tenses and a visual representation.
I have always used this handout with elder students (when I was in private education) and as I said with younger ones (when they are introduced to grammar in a formal way). The students who eventually keep it tell me that it helps them a lot.

I hope you find it useful…

TENSES

Λοιπόν… Περί QRC (Quick Response Code) ο λόγος!

Όταν τα Χριστούγεννα έψαχνα για μια πιο πρωτότυπη ευχή στους μαθητές / συναδέλφους μου έπεσα μπροστά σε ένα tutorial που συνιστούσε τη χρήση QR Codes για μια πιο προσωποποιημένη ευχή: η εκπαιδευτικός πρότεινε τη χρήση του για να απευθύνει σε κάθε μαθητή ξεχωριστά μια ξεχωριστή ευχή που ενσωμάτωσε με QRC στην κάρτα καθενός.

Μου φάνηκε διαφορετικό και challenging. Μέχρι τότε είχα δει να το χρησιμοποιούν οι κόρες μου αλλά δεν είχα προσέξει πόσο εύκολο ήταν. Νόμιζα ότι θέλει κάποια ιδιαίτερη εφαρμογή-και δεν είχα μπει στον κόπο να μάθω πώς.

Κακώς. Πολύ εύκολο. Τα περισσότερα κινητά το έχουν στη Σάρωση.

Και τα περισσότερα παιδιά πλέον έχουν smart phones, ακόμα και από τις μικρές τάξεις του δημοτικού! Στο σχολείο θα μπορούσαν να χρησιμοποιηθούν και tablets (ή του σχολείου ή και κάποιων μαθητών αν μπορούν να φέρουν).

Αν δεν υπάρχει σαρωτής στο κινητό ή το tablet μπορούμε να κατεβάσουμε μια εφαρμογή όπως το QR Code Reader:

https://play.google.com/store/apps/details?id=tw.mobileapp.qrcode.banner&hl=el&gl=EE

Αυτό βέβαια που ενδιαφέρει είναι πώς μπορούν να αξιοποιηθούν στην εκπαιδευτική διαδικασία. Παρακολουθώντας κάποια tutorials επέλεξα κάποιες ιδέες που θα μπορούσα να εφαρμόσω με τους μαθητές.

  1. Ενσωμάτωση σε φύλλα εργασίας (π.χ. αν θέλω να προσθέσω επιπλέον υλικό και πηγές)
  2. Ενσωμάτωση σε τεστ με συμβουλές βοήθειας για αυτούς που δυσκολεύονται ή με τις σωστές απαντήσεις για αυτοαξιολόγηση.
  3. Δημιουργία αφίσας με επιπλέον πληροφορίες σε διάφορα σημεία.
  4. Δημιουργία καρτελών για οδηγίες π.χ. σε μία συσκευή.
  5. Δημιουργία καρτελών για πληροφορίες για μία σημαντική προσωπικότητα (π.χ. στη βιβλιοθήκη του σχολείου για συγκεκριμένους συγγραφείς / βιβλία ή σε ένα μουσείο προσωπικοτήτων κάτω από την εικόνα του καθενός)

Οι δύο όμως επιλογές που έχουν μία πολύ μεγάλη δόση περιπέτειας και παιχνιδιού είναι οι εξής:

  1. Δημιουργία διαδραστικού χάρτη, όπου τα QR Codes παραπέμπουν σε χάρτες, βίντεο, σε Google Maps- Google Earth (κοιτάξτε εδώ ένα φανταστικό project: https://twitter.com/MrsTullio/status/1331765288346546178 )

(μήπως θα μπορούσε να γίνει ο treasure hunt map στο Unit 2 του Magic Book της Γ’ δημοτικού τέλειος έτσι??? Μια ιδέα λέω…)

  1. Κυνήγι θησαυρού ή Scavenger Hunt, όπου οι συμμετέχοντες αναζητούν μια λίστα από κρυμμένα στοιχεία (κάποια ή όλα σε QR codes) ή ερωτήσεις για να γίνει το παιχνίδι ακόμα πιο μυστήριο και διασκεδαστικό για τους μαθητές.

Ελπίζω οι σημειώσεις μου να βοηθήσουν κι εσάς!   🙂