Our talking portraits museum is ready to open its door to our esteemed guests!
It was created some time ago (see details here) and my 6th grade students readily responded and created their talking masterpieces!
It all started when a student asked for more information about the famous Mona Lisa . This triggered the creation of a text intended to arouse students’ interest: in it a talking Mona Lisa would speak for herself, giving details of how she came to life! Then, with the use of technology (Chatterpix application) Mona Lisa would actually speak!
The short video of Mona Lisa’s life was embedded in an art museum (templates provided by emaze , an online, web-based presentation creator that can be used to easily build and edit visually compelling and engaging presentations).
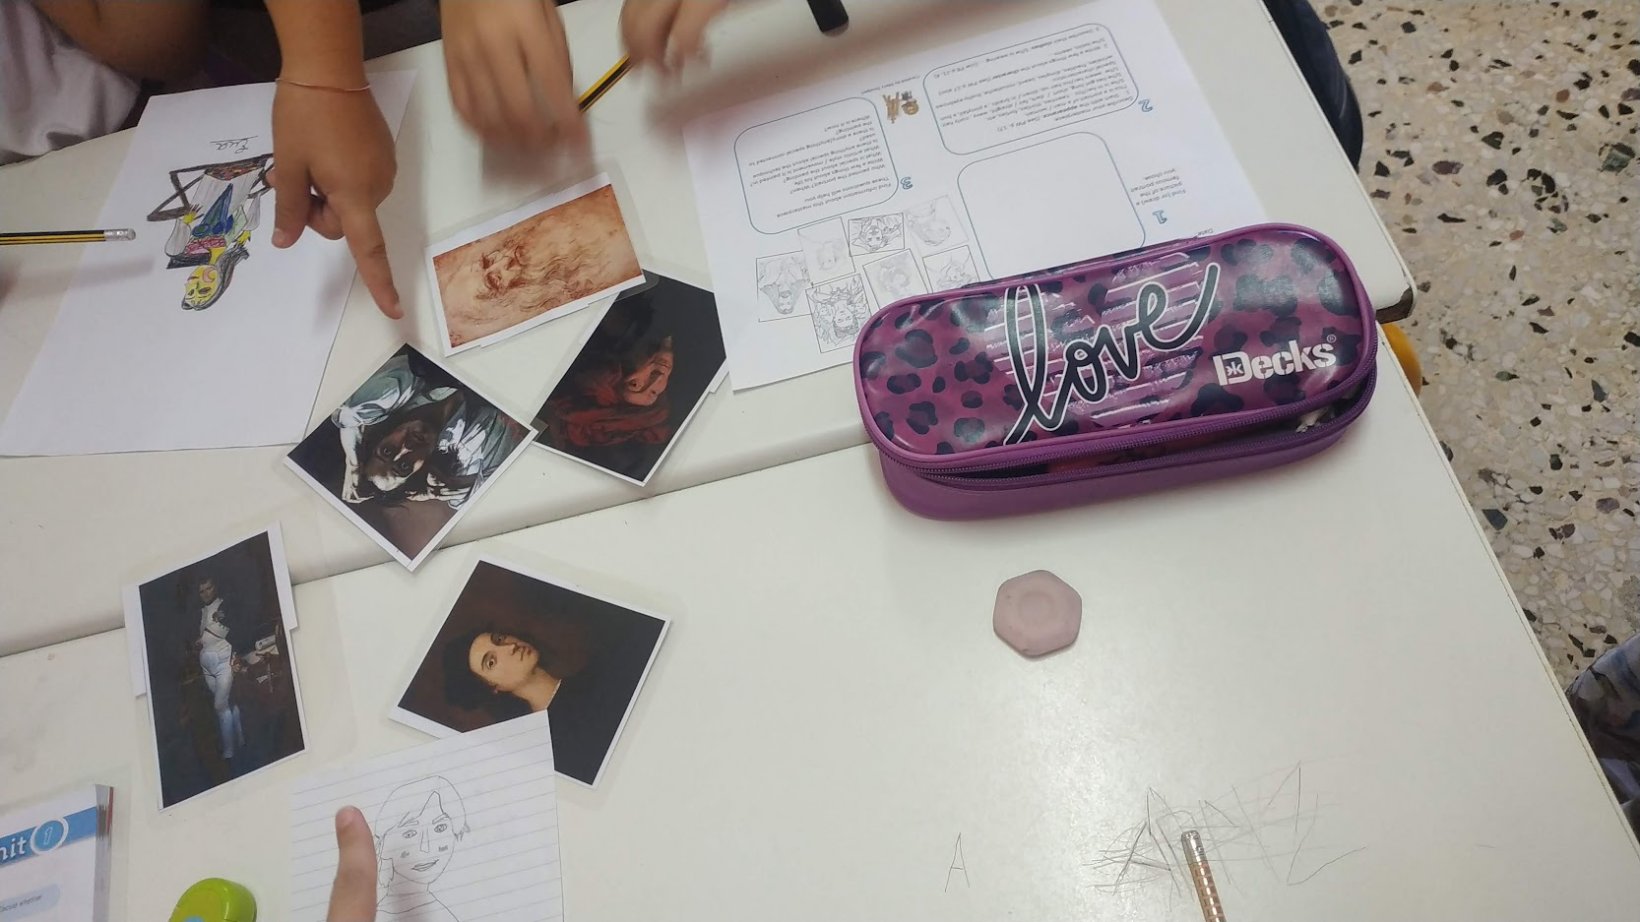
The presentation made quite an impact on students; that was the springboard for our art (and, of course, language!) project: the students themselves (with the guidance of the art teacher) would choose a famous portrait and describe it. The worksheet used provided the scaffolding for their effort (Worksheet). It was a creative procedure and, at the same time, a good revision of things we learnt in 6th grade (describing people’s appearance, character, clothes) and guided search through the Internet for the necessary information.
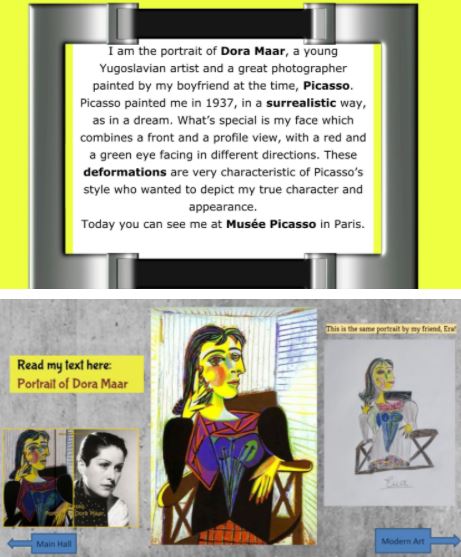
The end product was a text containing information about the painting and its whereabouts, the artist who painted it, the technique it was painted in. A more challenging step was for students to produce a juicy summary: all this body of information had to be condensed (as Chatterpix allows you to record for only 30′) and personalised (each student had to ‘become’ the portrait!) The students had to act out their script, improving, thus, their reading skills, their intonation , their speed of reading. Their short videos were then added to the museum created by the teacher: Famous Talking Portraits Museum!
At the same time, in collaboration with the ICT teacher, the children created their own version of the Famous Talking Portraits Museum using Google Slides. In a neat Museum they included the Mona Lisa section (created by their teacher) and their own talking portraits, their text and even some of their paintings inspired by the portraits they had chosen.

All these actions had to be orchestrated through a very difficult year, with all the devastating impacts Corona Virus Pandemic had on learning: frequent quarantines, demoralizing alienation when schools were closed and disorientation when schools were open. Children struggling to keep up with the newly imposed technology and children struggling with no technological means whatsoever. The students, though, coped with the new challenges and helped each other with the aim of creating their own museum.
The Museum opened its doors to our school (and the whole world!) at the end of the 2020-21 school year, bringing this difficult year and this challenging project to its closure (but leaving the Museum’s doors open for other students to add their creations!)
The project made a very positive impact on students and helped the teaching and learning procedure through the hard times faced by the school communities during successive lockdowns and short periods of face-to-face learning. It provided the teacher with a powerful tool to inspire students and students with a strong motivation to keep working on the learning process and a touch of amusement. Their effort created positive feelings of accomplishment to students upon completion and presentation of their work to the school community.
Here is the version of the museum created by the students Famous Talking Portraits Museum (with Google Slides)

Our project was among the 5 finalists in the Local Innovation category for the ELtons awards 2022!

This is our video:
The Museum curator,
Mrs Mary