A Pirate’s Treasure Chest of Learning

treasure chest

In the world of education, creativity knows no bounds. A simple shoe box, often discarded after serving its primary purpose, can be reborn into a treasure trove of learning opportunities. The allure of adventure and the thrill of discovery captivates the imagination of young learners.

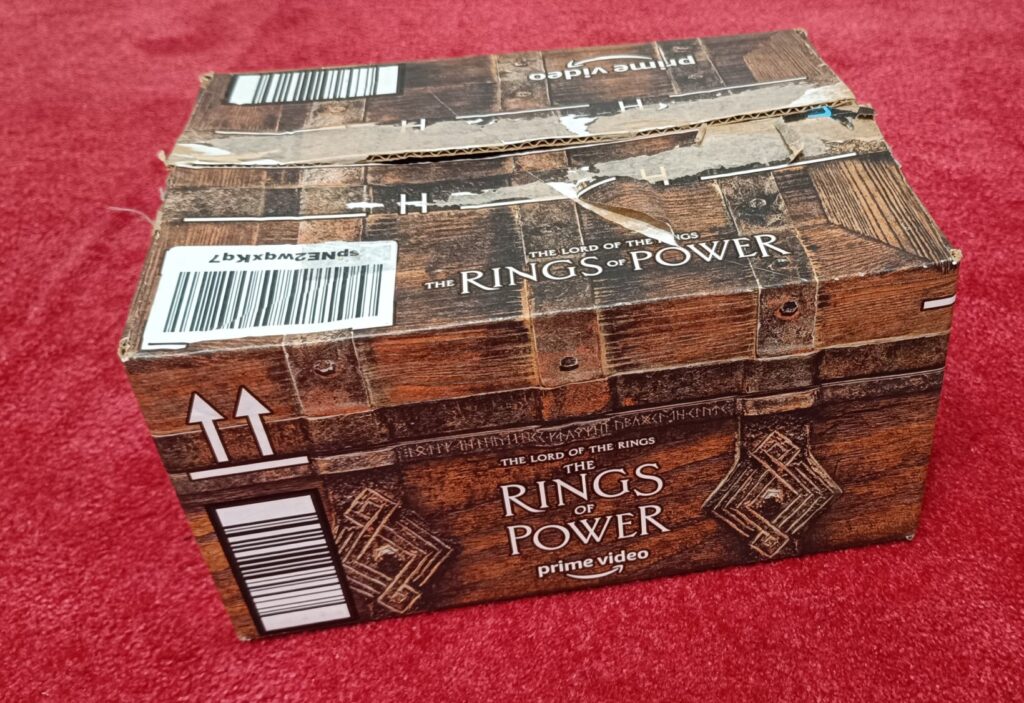
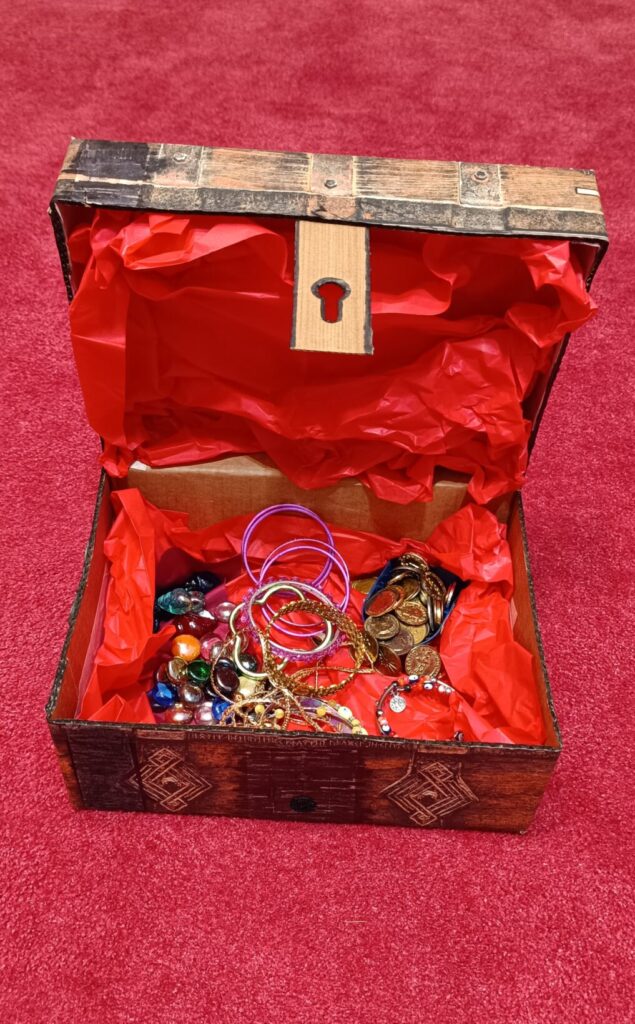
When I found this handsome box discarded I saw its many potentials! So I secured it with paper tape, reinforced it on the inside (with parts of another pizza box!), cut it in the middle, covered the parts which had letters on them, tried to imitate the style of the rest of the box with various matching paints, crafted a lock, and finally, lined the interior with red wafer paper. When my treasure chest was ready, it was time to put my treasure inside! Children’s jewellery, plastic or glass gems, lucky plastic coins gathered from vasilopita pies (vasilopita is a traditional Greek New Year’s Day bread, cake, or pie that contains a hidden coin) and any other trinket I could think of!

I will use my treasure chest with my 3rd graders, since there is much scope in their 1st and 2nd Units for a re-enactment of the lessons where the treasure chest is discovered by Kelly and then used by the pirates in Captain Cook’s crew!

Here is a map in imitation of the map in Lesson 1 of Unit 1: Treasure Hunt Map

and the bamboo leaves with the panda on them (like a puzzle) in Lesson 2: Bamboo leaves

For a pirate hat have a look at my ‘Ahoy mates!’ blog post here.

Have students make their own pirate treasure chest: this activity will not only add sparkle to the lesson but also encourage students’ fine motor skills and imagination as each one of them will create their own. Have students recycle (or rather, upcycle!) materials such as boxes, cardboard scraps, ribbons, strings, or any other embellishments in order to make a treasure chest for their “treasures.”


Transforming a shoe box into a pirate treasure chest not only engages students in a fun and hands-on activity but also opens the door to a wealth of educational possibilities:

Literacy and Phonics:

Hide letters or words within the chest, prompting students to identify and spell them correctly.

Creative Writing:

Encourage students to develop pirate-themed stories centred around the treasure chest. This activity fosters creative writing skills, expands vocabulary, and allows for imaginative expression.

Mathematics:

Introduce counting and sorting using the toy coins or jewels. Create math problems based on the number of treasures hidden in the chest. 

History and Geography:

Explore pirate history and geographical locations of famous pirate adventures. Incorporate maps and discuss the concept of buried treasures to tie the project to real-world historical contexts.

Teamwork and Collaboration:

Assign group projects where students work together to create a collective treasure chest. This fosters teamwork, communication, and collaboration skills.

Reward System:

Fill the treasure chest with small prizes, such as stickers, candy, or small toys, to reward students for exceptional work or good behaviour.


Unlock a treasure trove of educational opportunities through this tangible artifact!!!

Making (and using) a storytelling chair

IMG 20240104 011341

Storytelling for kindergarten (and, of course, primary school) children is highly beneficial. Not only does it inspire imagination, but it’s also highly engaging. It captivates young learners’ attention, acts as a language booster, and ignites a love for literature.

Using puppets, props (even the simplest ones can have a tremendous effect on the little ones! – try pressing all your fingers to the front, using your hand as a beak and then engage in a dialogue with it), body language and animated voice can encourage imagination and creativity and foster social interaction: children empathize with characters and engage in discussions, developing, thus, their critical thinking, a much sought-after skill not only for their personal growth but also for their academic success. Sometimes nothing else is needed when telling a story other than imagination: creating mental pictures and getting the children physically engaged through movement can do the trick (‘imagine being the wind that blows the leaves off the tree, or being the leaf thrown out of the tree by the wind!’, ‘imagine climbing up the beanstalk, careful not to slip and fall, looking down as we climb’).

Finding the age-appropriate book for our students is of paramount importance. Books that contain simple language (or you can simplify it yourself as you read), and repetitive patterns are very helpful: fun aside, repetition can boost students’ confidence, consolidation of new vocabulary and sentence structures.

And how should you narrate (or read) a story? Standing or – better – sitting in the middle of a designated storytelling area is a good idea. A storytelling chair can serve as a focal point for teacher-student interaction during storytelling sessions, fostering a positive learning atmosphere. It can enhance engagement, create a sense of anticipation, and provide a comfortable and focused environment for children, making the storytelling experience more memorable and enjoyable.

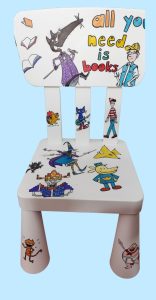
I’ve had my eye (and set my heart!) on getting one – but then I thought: why not MAKE one? So I bought a plastic chair with ample writing space and got a pencil, a rubber and some permanent markers, and some days later … my storytelling chair was ready!!!

You can see the story of my chair unfold here:

Ways to use a strorytelling chair

Tell stories and repeat them often. Children feel more confident listening to stories when they know them inside out and know exactly what comes next.

When children become very familiar with certain stories invite them to sit on the storytelling chair and recount (or repeat) a part of the story. Anyone who sits in it becomes the storyteller with powers to entrance their listeners!

Have students identify another character on the chair. What would happen if the hero of the story met another hero (and became good friends with them?) – time for some critical thinking and communication development then!


Food for thought

How about you?

How would you use a storytelling chair?


Can you find the stories that appear on my chair?

How many can you find?

(here is something that will help you 😆 Books that appear on the storytelling chair)


How many have you used in your teaching?


Most importantly, have fun and enjoy the process yourself: approach storytelling with enthusiasm and joy. Your genuine passion for the story will be contagious, and the child will sense your enjoyment and engagement.


Hibernation!

mary bear hybernating 1

It’s winter time! Let’s talk about animals hibernating!

But what is hibernation?

Watch these enlightening videos (I learnt a lot myself!!!)

Getting Ready for Hibernation!  and Hibernation of Animals

Here are some nice puppets: Hibernating animals puppets 

BEAR

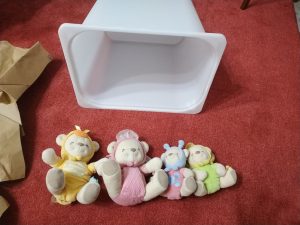
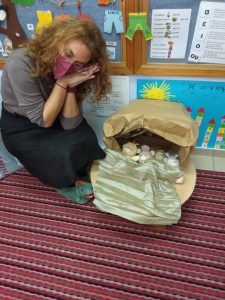
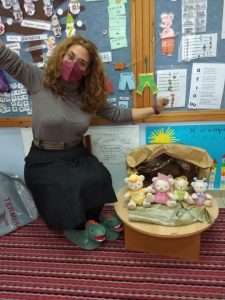
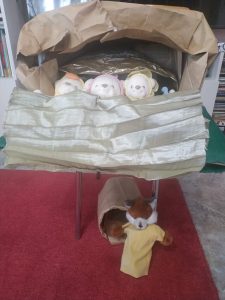
I wanted to find a simple way to show kids what the animals do when they hibernate: I built a cave using a large storage box which I covered with brown paper bags and brought my bear family (kept from the time my daughters were little …). Then, showing a picture of autumn and winter we pretended to fall asleep, while in the pictures of spring and summer we stretched out our hands to say ‘Wake up!’  The bear family entered the cave one by one, after yawning and saying ‘I want to sleep’ and at the end we covered them with a warm blanket!

We also sang the song (to the tune of ‘Frère Jacques’)

Bears are sleeping (2)

In the cave (2)

Soon it will be springtime (2)

Wake up bear! (2)


You can watch the song here in this small video I made (with the help of our music teacher, Mr John Aivazis!) 

Bears are sleeping


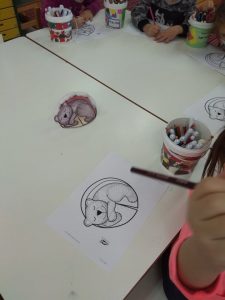
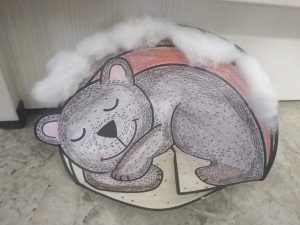
We also made a very simple construction with a sleeping bear (which we cut and put cotton on top of the cave) that I found here:

Hibernating bear craft


HEDGEHOG

Another animal that hibernates is the cute hedgehog!

There are so many easy crafts to make with the kids (have a look at Krokotak ) but I have a soft spot for paper rolls! (find the hedgehog along with other animals in my post: Make your own zoo with paper rolls from the loo! )

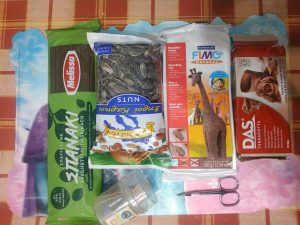
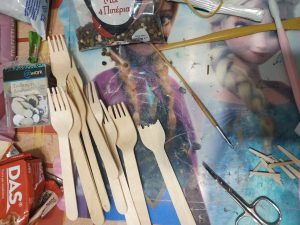
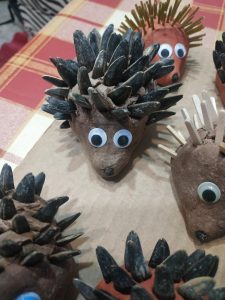
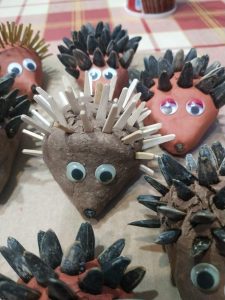
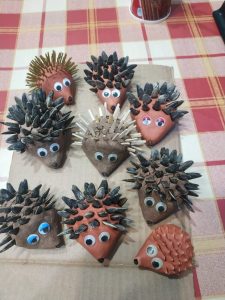
This time we made a whole hedgehog family from brown clay (or plasticine) and various other materials: wholegrain or spinach spaghetti or sunflower seeds or wooden fork tines (avoid toothpics !!!)

Have a look here:

Cute, aren’t they?

This is a little song I made up which we sang (to the tune of ‘I’m a little teapot’) accompanying it with some movements:

I’m a little hedgehog 

Brown and small

Here are my spines (or spikes)

I roll into a ball

When the weather ‘s cold 

I build my nest

Away I crawl

and have a rest


Here is a small video I made (with the help of our music teacher, Mr John Aivazoglou!)

I’m a little hedgehog

Here is another sweet song about hedgehogs: The Hedgehog song

And here is a sweet video about friendship among a prickly hedgehog and other animals: Erste Christmas Ad 2018: What would Christmas be without love? 


IMG 20220128 160743


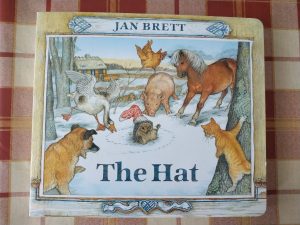
We also read the wonderful Jan Brett book ‘The Hat‘.

You can find the story patterns here: Kizclub story patterns

A nice activity (I found here by Jennifer Phillips is to print out the animals from the book, hand them to children and ask them to bring them when you get to the animal in the book. Easy and fun!!!

Or colour this page from the book!

You can even print the animal masks and put up a little show!!!

For more Jan Brett stuff visit the author’s website: Welcome to the world of Jan Brett


FOX

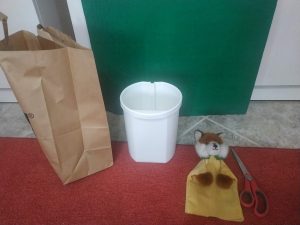
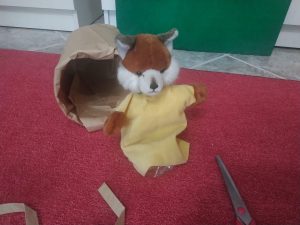
Next animal (that doesn’t actually hibernate but also keeps warm in her den) is Foxy (a little fox that I bought second hand for just £1 (!!!) at the Covent Garden May Fayre and Puppet Show some time ago). If you do not have a puppet or a stuffed fox you can easily make one from a paper roll (I have a photo on how to make one easily together with templates for other animals in a previous post in my blog: Make your own zoo with paper rolls from the loo!

11

With a smaller storage box covered with brown paper bags (again!) and a song (to the tune of London bridge is falling down), Foxy will go to sleep, too:

Foxy’s sleeping
In her den (2)
In her warm fur!


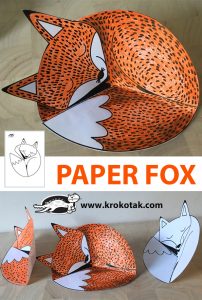
We also made a very simple construction with a sleeping fox that I found here:

Sleeping fox craft


What do you say? Shall we dance our hearts out before we hibernate 😛 ?

Hibernation song

and

What Does The Fox Say?


PS: I found some very nice material for flashcards and a picture with sleeping animals here:

Hibernation

Pete the cat!

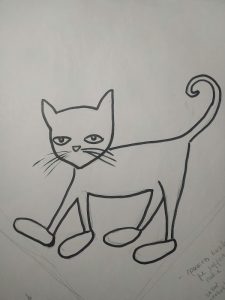
He’s super cool, a blue furball remaining calm in the face of adversity: when his pristine, white shoes, his pride and joy, become red, blue, brown and, finally, wet, does he lose his calm? Does he cry? No, no, no! He just changes the words to his song!

That’s what makes Pete the cat so popular with kids and educators alike. Kids want to relate to such a cool type and teachers want to instil the abilities of self regulation and resilience to their students. This imperturbable blue cat is such an appealing role model for kids to relate to! (Come to think of it, why not for teachers, as well?)

Its main character’s upbeat, happy attitude, coupled with vivid colours and a memorable, repetitive ditty make the book a must-read, suited for primary students of all grades. I used it with first graders, and plan to use it not only with kindergarten pupils but older students as well!

There are a host of activities and resources that relate to the book, this delightful book, written by Eric Litwin (who brings bookwriting and music together!) and wonderfully illustrated by James Dean (not the actor, of course!)  and video.

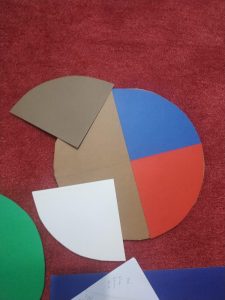
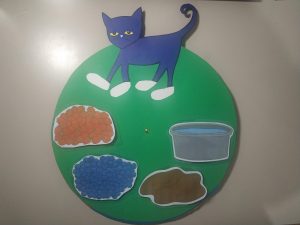
I made this funny story prop to help pupils repeat the story (after we have read the book and watched the video). The rotating disc enables the impressive change in Pete’s shoes when he inadvertently steps in all kinds of colour-changing substances: the disc is separated in 4 quadrants (white, red, blue and brown.) The disc is covered by a green circle on top of which the cat is glued. The shoes are cut on the green surface (best cut with an exacto knife pen for more precision). All the layers are connected in the middle with the help of a split spin.

Here are some pics:

And here’s the end product, with velcro straps to hold the laminated images of strawberries, blueberries, mud and the bucket of water (found at kizclub Story Props)

Here’s how I used it with my 1st graders:


I will use some easy artwork as well from Pete the Cat Activities: Pete the Cat Rocking In My School Shoes: Coloring

Hope you will find this article useful (and not  CATastrophic!!! 😆 )

Little Red Riding Hood

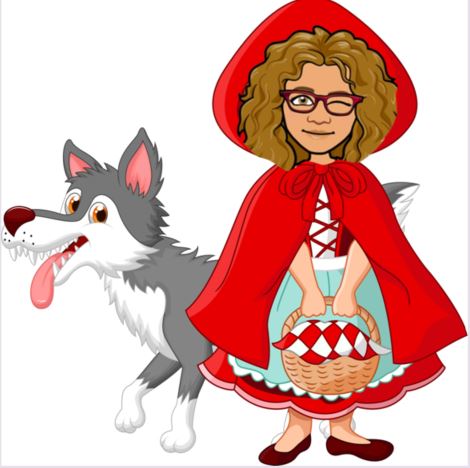
Once upon a time there was a dear little girl who wore a little hood of red velvet given to her by her grandmother … The much beloved fairy tale Little Red Riding Hood is ideal to teach to 1st graders (why not 2nd or 3rd or…?) Well known fairy tales provide both children and teachers with a familiar starting point from which to explore stories in a second language. A wide range of activities (from oral storytelling, dramatic play, book making, creating story props, designing masks and making story boxes to name but a few) can be used (have a look here for some ideas).  

Keeping early literacy fun and playful is essential. The foundations of good literacy skills dwell in comprehension and language skills, which are fostered best through listening to stories and retelling them in a fun way. Oral storytelling (with emphasis on opening and closing lines, along with formulaic phrases and repetitive structures) could be enhanced by the use of puppets. All the best-loved bits – particularly the lines children love to listen to could be practiced in a fun and engaging way.

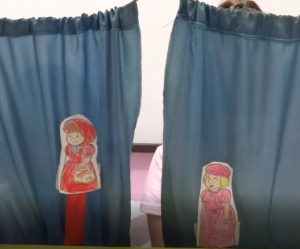
One way to do easy puppets is to print the figures, have the students paint it, then cut them out and stick them to popsicle sticks.

Here is the template:

https://blogs.sch.gr/mdoulgke/files/2021/05/ddc53de97a3f72b1ff75344d86d000db.pdf

Another (more fascinating because of the game of shadows and light) is to try narrating the fairy tale with shadow puppets (see how to make a shadow puppet theatre here).

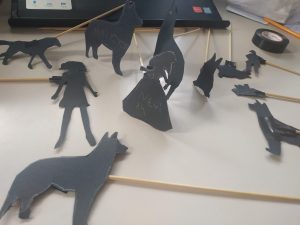
I have created a set of eleven silhouettes below: a girl, a wolf, a woodcutter, a mother, a grandmother, a house, a tree, and a bush with flowers, a bed, a mushroom and a hare.

Here they are:

https://blogs.sch.gr/mdoulgke/files/2021/05/house-woodcutter-tree.pdf

https://blogs.sch.gr/mdoulgke/files/2021/05/wolf-bed-1.pdf

https://blogs.sch.gr/mdoulgke/files/2021/05/mother-LRRH-granny-mushroom-flowers-hare-1.pdf

Watch this video for some help:


Use these templates to create your own shadow production of Little Red Riding Hood with your class! Make the room dark and have fun while practicing students’ narrative skills!

This is the little act I pulled together using the text from the PEAP material  :


Good Luck!

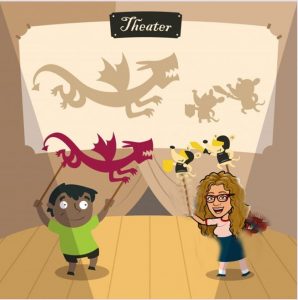
Explore the World of Shadows with shadow puppets!

Using puppets is a great way to set the context for any language activity you want! It’s an excellent opportunity for children to refine their speech sounds through listening. But when students use puppets the gains are manifold: children (even the reluctant ones) communicate naturally with puppets and gain confidence in expressing themselves! For some (not so) unfathomable reason, children are more willing to speak to or with a puppet than their teacher! Don’t take it to heart; seize the opportunity to get them to speak!

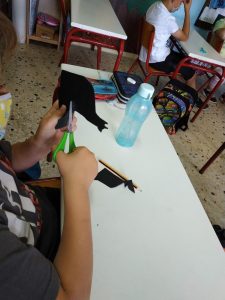
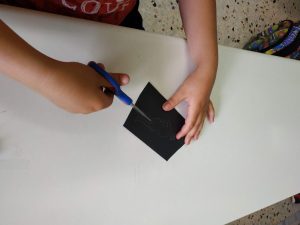
Moreover, when students make their own puppets their fine motor skills are enhanced.

Stencils or cookie cutters are ideal to help younger learners so that they can bring their characters to life. If the pattern is intricate let them cut the outline and help them with inner details (ideally use precision manicure scissors or a hobby knife for cutting).

Next glue or tape each of your cardstock cut-outs onto a straw, chopstick or popsicle stick. (watch this for more details of how to make a shadow puppet theatre or your figures: https://www.youtube.com/watch?v=BHw-4UOcj40 )


Now let the students explore the potentials of the medium and unleash their imagination!!!

Create your own shadow puppet theatre!

Shadow Puppetry is said to have originated in China over two thousand years ago! It is now a popular form of entertainment in countries all over the world. Its simplicity, portability and mesmerising shadow and light performances are perfectly suited for impressionable young minds!

Shadow puppet theatre can be used in primary ELT in many ways (you can get an idea if you read this wonderful article by Tatjana Jurisic here)

Well? Are you up for it?

If yes, you need to build your theatre!

Here is how I made mine:

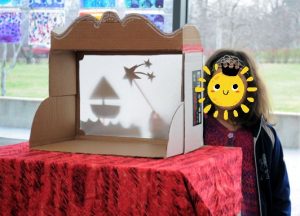
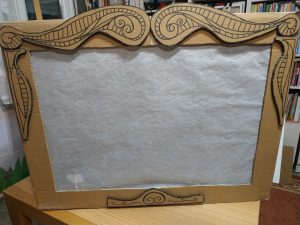
Any cardboard box will do the trick. If you want your students to collaborate you need to find a big one: the more students behind the scene, the more space you need! (I found a quite big, but rather shabby box—but don’t worry, in the dark no one can see, everyone is engrossed with the performing shadows).

Baking parchment or rice paper can be used to cover the opening which will be used as the screen, and a light source is necessary (be it the light from your mobile phone or any type of clear bulb). I used a led rigid strip hard light tube lamp.

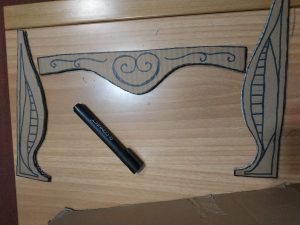
The decoration is entirely up to you! I made a wavy pattern which I mirrored and some other decorations (from the paper that was left from the opening of the scene).  This is a bit difficult as it takes some skill end effort with the box cutter. Alternatively you can paint the whole box with the help of the students!

Bring the magic of shadow puppet theatre into your classroom! Let the children be spectators and watch the shadow story unravel, or let them take the roles of actors and directors to create their own world of shadow adventures!

Watch this for some help: https://www.youtube.com/watch?v=SpqmNys-jLQ


The very Hungry Caterpillar puppet

This epic, timeless, much-loved favourite book for so many of us, illustrated and written by Eric Carle (first published in 1969) lends itself to soooo many enjoyable activities that I can’t honestly say if the students enjoy it more than teachers! In fact, there are so many that it is hard to pick just a few!

The ones I like the most, though, are the puppets which you can make and use to bring the story to life along with the students!

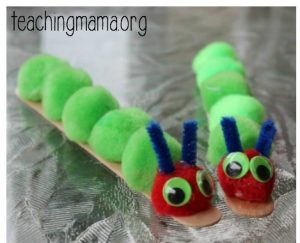
There are so many variations of it. Over the years in order to make the Very Hungry Caterpillar we’ve used  pom poms / paper chains / egg cartons / craft sticks (popsicle sticks) / bamboo skewers / construction paper for finger puppets

and

plasticine / self drying modelling clay / construction paper and a hole punch for the food.

This year in order to convey the undulating wave motion of a caterpillar I thought about doing it in the accordion-folded shape out of two even strips of green paper (preferably two shades of green).

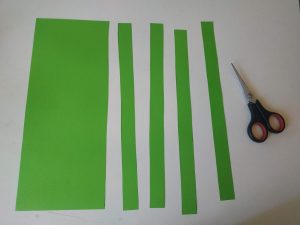
This is how you do it: take the two strips and position them in a 90° angle. Glue the connecting papers together. Fold the bottom strip over the top and crease the fold along the edge. This will make the accordion fold tight! Continue this process until all the paper has been folded.

Then use red paper for the head, yellow and green for the eyes and a piece of pipe cleaner for the antennas. Finally, use a hot glue gun to add 2 chopsticks at the front and bottom of the accordion among the creases.

The caterpillars (two, one smaller and one bigger, since it will gobble up all that food!) will stretch and fold like real ones!

Now, your own Very Hungry Caterpillar is ready to give you and your students countless opportunities for fun and learning!


Here’s how my little students played with the caterpillar (and produced small parts of the story!!!)


ST-PATRICKS-Day-Poster-1

St. Patrick’s day

St. Patrick is the patron saint of Ireland. St. Patrick’s Day is celebrated by the Irish all over the world on the 17th of March (the anniversary of his death in 461).

But who was Saint Patrick?

Even though the patron of Ireland, he was born in Britain near the end of the 4th century A.D.  At the age of 16 he was kidnapped and taken to Ireland as a slave. During this time, he worked as a shepherd and became a devout Christian. Patrick escaped after 6 years as a prisoner, but after a vision returned to Ireland as a missionary and managed to convert the Irish to Christianity. There are many legends around him, for example, that he drove all the snakes out of Ireland. He used the shamrock (plant, each of whose leaves is divided into three leaflets) to explain the Holy Trinity to Irish people.

St Patrick’s Day is celebrated in countries with people of Irish descent. It was emigrants, (especially to the United States), who transformed St. Patrick’s Day into a secular holiday of revelry and celebration of all things Irish. Green is connected with the day and people participate in the “wearing of the green” by usually putting a shamrock (the Irish national plant) in their lapel. Even beer is sometimes dyed green to celebrate the day!


Forgot to wear green on St. Patty’s Day? Don’t be surprised if you get pinched. St. Patrick’s revellers thought wearing green made one invisible to leprechauns. 

But what are leprechauns?

Leprechauns are fairy creatures who would pinch anyone not wearing green. A leprechaun looks like a little old man and dresses like a shoemaker with a cocked hat and leather apron. According to Irish folklore, leprechauns are tricksters who mend the shoes of Irish fairies. The fairies pay the leprechauns for their work with golden coins, which the leprechauns collect  in large pots. The legend says that if you catch a leprechaun, you can force him to tell you where he hid his pot of gold. Supposedly, this pot of gold is hidden at the end of a rainbow.

Let’s make a leprechaun, shall we? Then we might be able to find his hidden pot of gold (this is something you must draw!!!)

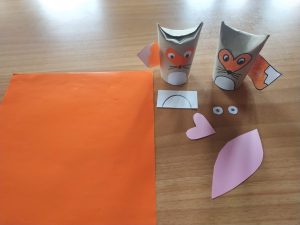
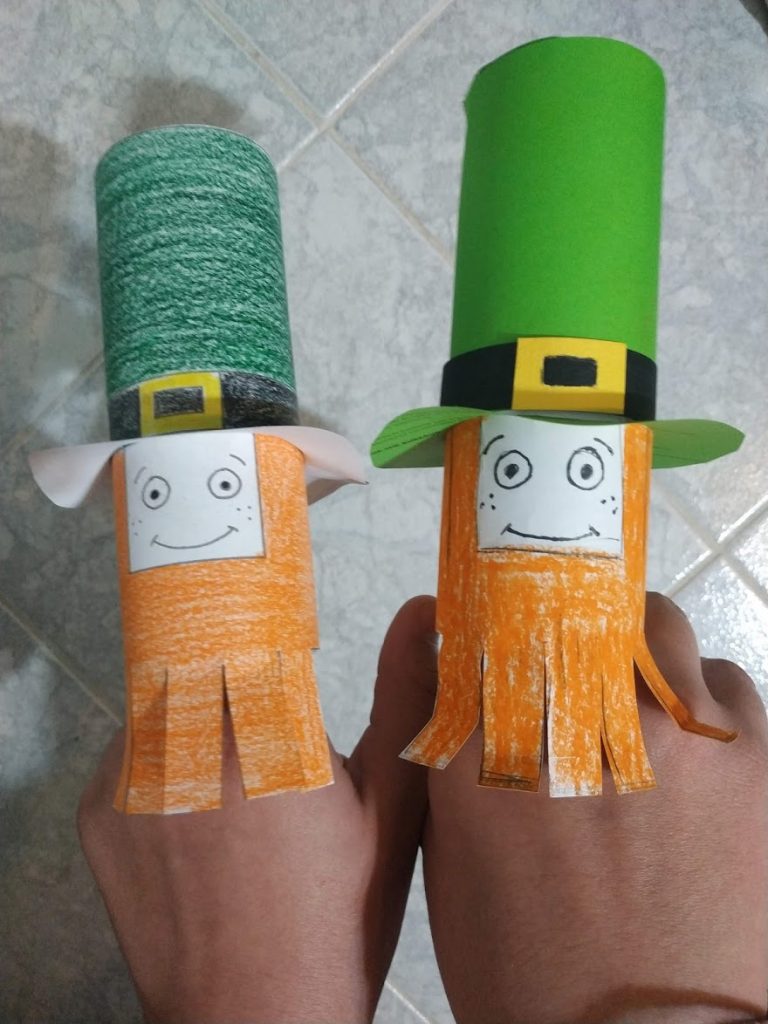
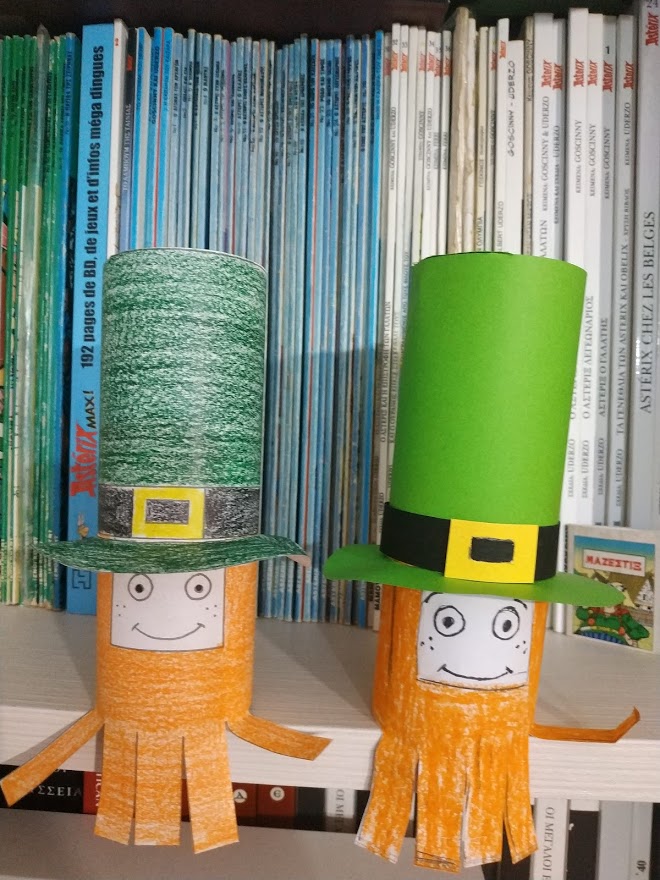
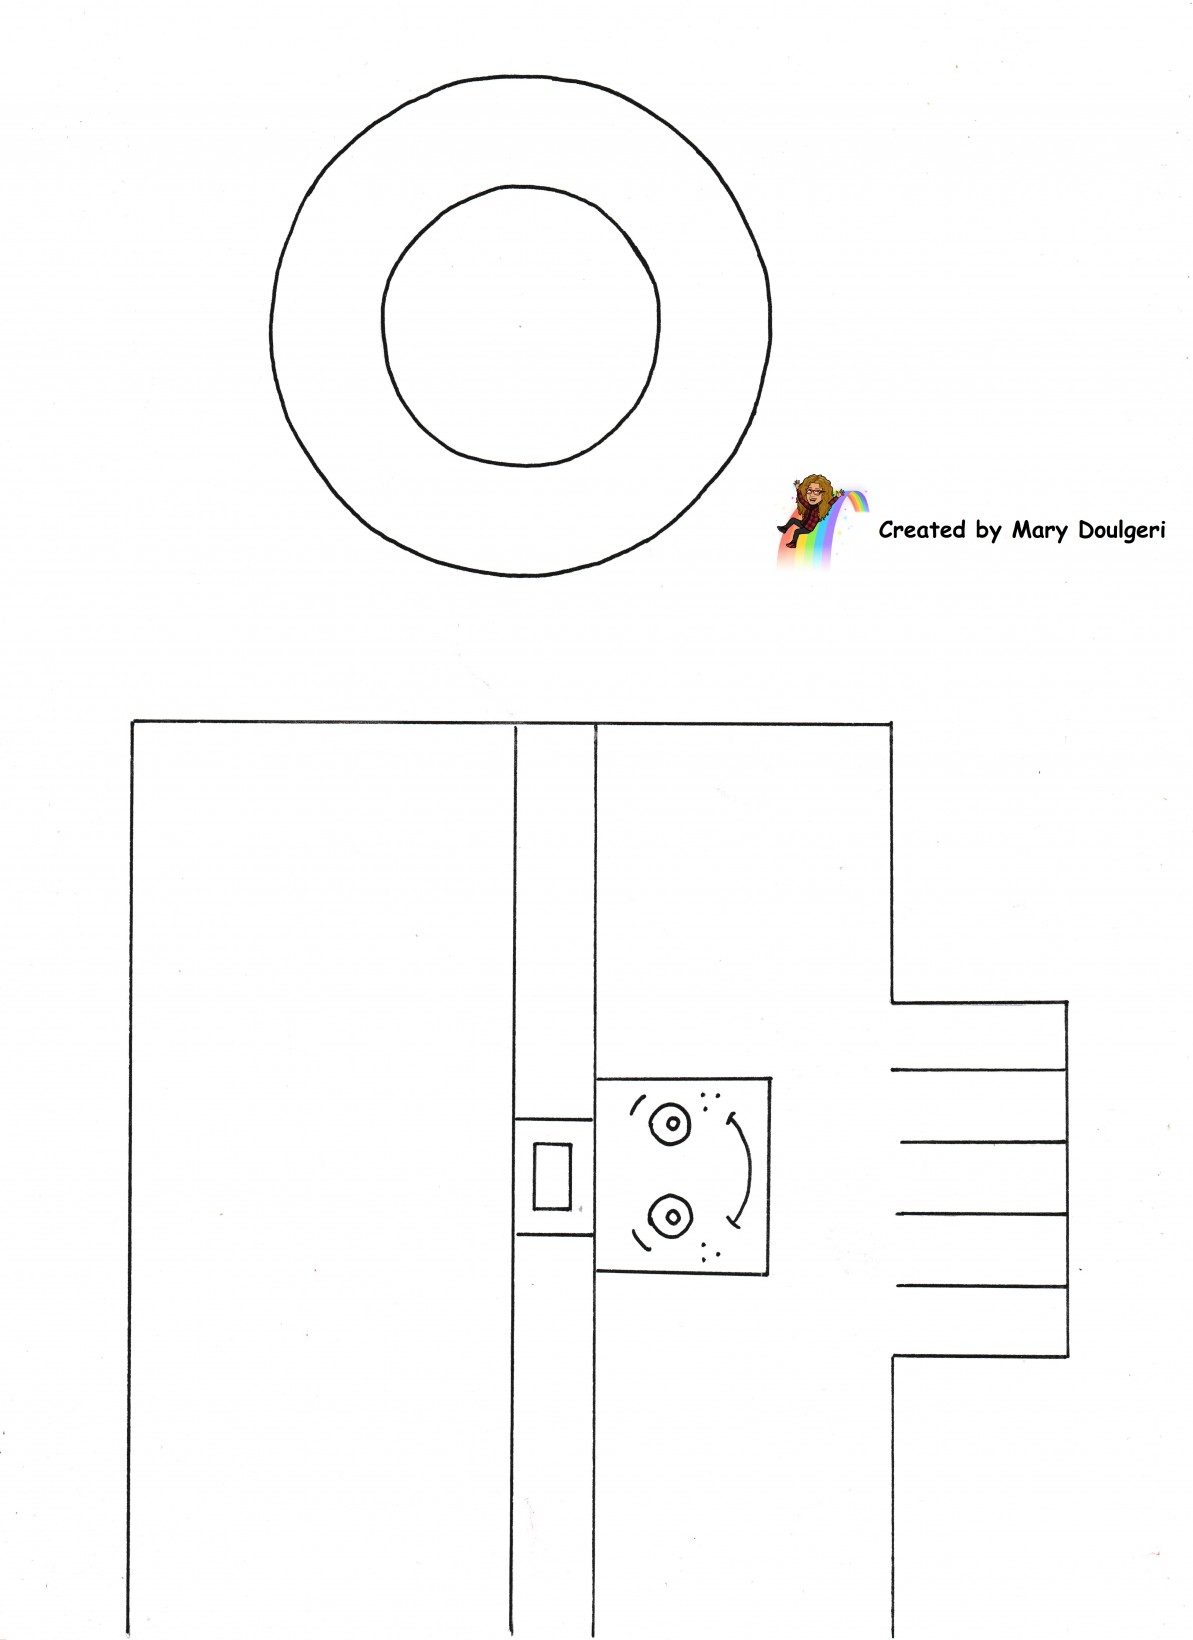
Find a paper roll and either paint it green with ginger hair and beard or use the template to cut green paper for the hat and orange for the hair and beard.

Have a look:

Here is the template:


Have a look at this short St. Patrick’s video:


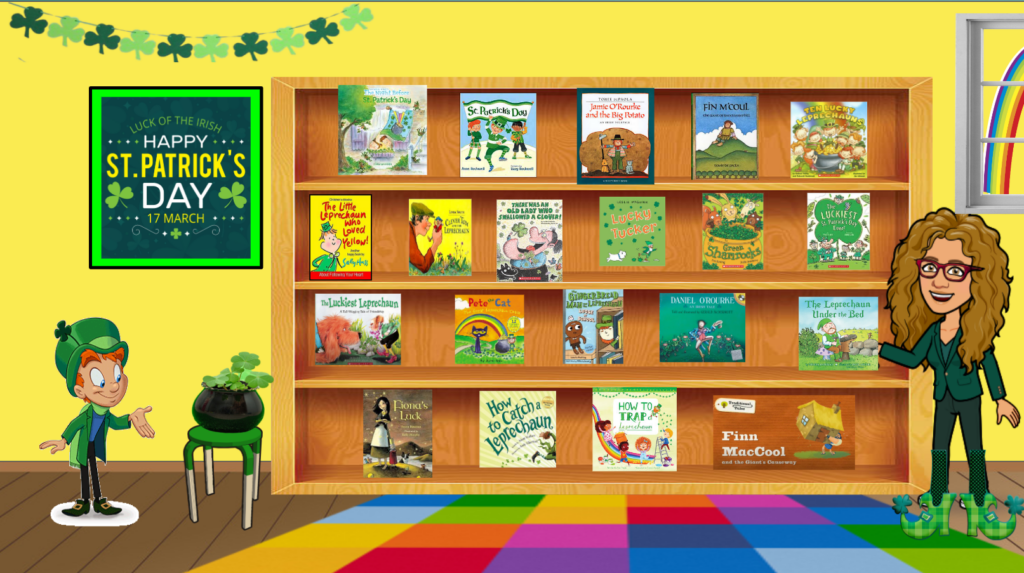
And here’s a whole library with books about Leprechauns!!!

Press on the picture!

leprechaun


IMG_20210307_002750

The Very Hungry Caterpillar

Eric Carle’s work is loved and admired throughout the world. It’s not only his ingeniously crafted children’s stories but his iconic collages and artistry that have fascinated children and adults alike.

For more than 50 years (since it was initially published in 1969) The Very Hungry Caterpillar has ‘nibbled’ its way into everyone’s hearts and has become one of the top selling children’s books of all time, translated into 66 languages worldwide. The story of the helpless, small, insignificant caterpillar which turns into a beautiful butterfly sends out a message of hope.
 

I tried to bring the story to life with simple materials:

For the caterpillar:

spongy foam cupoid (I found in the packaging of something!)

bamboo chopsticks (from Chinese takeaway food!)

roll of green sewing thread

little green pom pom balls

googly eyes for crafts

acrylic paint

hot glue gun


For the food:

kids plastic toy food (whatever I kept from my girls!)

self drying modelling clay (for the food items I couldn’t find…) OR playdough/plasticine

For the background:

coloured cardboard paper (blue for the night, brown for the tree, green for the leaves, white for the sun, various colours for the butterfly- I used a plush caterpillar)

watercolours

scissors (the background is something of a collage)

A little bit of imagination and … bish bash bosh! bada bing bada boom! Voila! Your Hungry Caterpillar storytelling set  is ready!

Mind you, my little silly rendition of the story took a lot of time and effort after all! The plan is to have the students create and then act out the story! I’m sure they’ll love it!

Here is the end product!


And this is the day I used my Hungry Caterpillar box in class:

hungry caterpillar