Screencast-O-Matic

Screencast-O-Matic is a free online screen capture tool. This tool records a designated area of your screen as well as audio and webcam input. You can record your screen, your webcam, or both. Recording options are simple and straightforward. The tool lets you adjust the size of the recording window depending on resolution. Free users can trim recordings, write captions, and add a limited number of music tracks before publishing.

Screencast-O-Matic helps you focus on what matters – your students. As a teacher you can create tutorials or lessons for classroom instruction and share these videos with students. The tool is very compatible with the principles of the flipped classroom (a new pedagogical model, according to which the traditional way of teaching (lesson at school – homework at home) is reversed: the lesson is delivered from the teacher through videos or podcasts s/he has made and which s/he has posted on the internet (or in the e-class / e-me). Then the students watch the new lesson on the computer or tablet and learn on their own, at their own pace. The next day in the classroom (even via WebEx) the comprehension of the lesson is checked, the questions are answered and the respective tasks and exercises are done in groups. This allows you to use your in-class time more efficiently.

Screencast-O-Matic can help you engage students with video conversations: you can have them record their ideas or thoughts about a classroom topic and communicate them with you or their classmates. You can also have the students create their own videos in projects and assignments, unleashing, thus, their creativity. They can even create their own how-to video, or partner with other students to create a group project.  This way the students take ownership over their learning and gain a deeper understanding of their knowledge!

The possibilities are endless!

Here’s a tutorial (in Greek…) about Screencast-O-Matic:

Screencast-O-Matic tutorial


Google Slides: vocabulary on a text at a click of a button

Google Slides are a great way to do so many things!

Why use them (and not PowerPoint, for example…) ?

Because they provide consistency, they can be easily accessed and shared and are ideal for group work. There are some minor downsides (fewer template choices, a gmail account is required), but the possibilities are endless!

You can give free rein to your imagination and creativity and create virtual worlds. You can create classrooms, libraries, escape rooms … practically, any scene!

Here’s an example:

What about a ‘room’ which recreates a scene (here: ‘Goldilocks and the 3 bears’) with active links on some objects of the scene? Or a classroom (with a teacher showing various videos and/or resources on the Letter Aa?)

But this is not the case here!

In this case I used a Google Slide Presentation to present the vocabulary of a text by immediately connecting the word to its meaning (sometimes reinforced with pictures) and its pronunciation. Magical, right?

Here’s the how-to video:

https://www.youtube.com/watch?v=jywXOkP9PMA

And here’s the end product (4th grade, Unit 5, Lesson 2, Βιβλίο Μαθητή):

Christmas in Britain

and another one (6th grade, Unit 3, Lesson1, Pupil’s Book), containing the pronunciation of the words as well:

Unit 3, Old Creatures and new

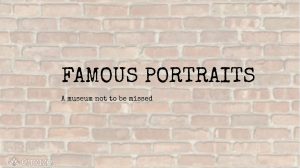
The Famous Portaits Museum (feat. The Mona Lisa and others to follow)

I created a speaking image of the painting The Mona Lisa (#monalisa) with #chatterpix

My plan is to have more talking portraits (of both men and women) in a virtual museum made by students (probably 6th graders) this time!

The tool I used to make the museum is emaze.

What is emaze?

emaze is an online, web-based presentation creator that can be used to easily build and edit visually compelling and engaging presentations on any personal computer. emaze presentations don’t look like the typical PowerPoint presentations you see every day. If you’re familiar with Prezi,some emaze presentations might seem similar (they can involve movement) but you can always create traditional presentations that are more akin to a PowerPoint. The plus feature in emaze is the ability to easily embed media of any kind, including HTML widgets. The ability to embed media of any kind is also an enormous benefit and allows students to integrate projects they’ve created on a wide variety of apps and sites.   

Once you’ve finished creating your presentation, you can download it in a variety of formats (in the Pro version), or share it out with a link, embed code, or through social media.

When you start using emaze you’ll be able to choose from one of their many predesigned templates.  Or if you’d rather start from PowerPoint, you can quickly import your pre-made PowerPoint presentation and convert it into any emaze template that you’d like.

Take a look at a short tutorial from the emaze team so you can see what the platform looks like in action:

https://www.youtube.com/watch?v=9DMcpXms_HU&feature=emb_logo

(adapted from http://www.edtechroundup.org/reviews/emaze-create-share-and-explore-online-presentations)

Here is my Famous Portraits Museum emaze:

https://www.emaze.com/@AOTOLWQLQ/famous-portraits

louvre

Art time: Mona Lisa

La Gioconda, which is also called the Mona Lisa, is the most famous painting in the world. Each year, millions of visitors throng to see the painting in one of the Louvre Museum’s largest exhibition rooms. Her name and image have been reproduced on every continent on coffee cups and T-shirts, in adverts and films, on the Internet, and on the facades of restaurants and beauty salons. Wherever we are and whatever we are doing-whether we are on a street corner, opening a magazine, or turning on the television-, La Gioconda’s smile is omnipresent.

From the book What’s so special about Mona Lisa? By Delieuvin V. & Tallec O.

What would Mina Lisa tell us herself about her exciting life if we could just hear her famous painting in the Louvre Museum?

Well, come closer… listen…

(The script was written by Doulgeri Mary, and the image became a talking image with the help of Chatterpix!

What is ChatterPix?

ChatterPix is an app that converts pictures of inanimate objects into pictures that talk! All you do is snap a picture, draw a line to make it talk, and record your voice! ChatterPix can be used to make silly greetings, playful messages, and creative cards. In the classroom, ChatterPix can be used as a way for students to take pictures of their work and record information about it! A student’s ChatterPix can be emailed, sent to YouTube, or saved on a device. Teachers can have students save their ChatterPix creations in the camera roll on an iPad to review later.

Here is a guide of how to use it:

http://chatterpixworkshop.weebly.com/uploads/5/1/5/8/51581143/chatterpix_howto.pdf

If you want to have a look at or use the script of Mona Lisa, here it is:

Mona Lisa


10 HABITS OF TECH-SAVVY TEACHERS

It’s not the apps you use or the skills you’ve mastered that make you truly “tech-savvy.” Rather, it’s a whole attitude of mind.

Here are the 10 most essential habits of tech-savvy teachers.

  1. They are flexible. Technology is constantly changing and evolving. Tech-savvy teachers are able to roll with the punches and adapt as needed. They always have a “Plan B” and even a “Plan C” when things don’t go quite the way they’d hoped.
  2. They communicate digitally. Tech-savvy teachers are comfortable in the world of email and social media, and they intuitively understand how to use these tools appropriately and effectively.
  3. They embrace change. These teachers do more than simply tolerate big change. Usually, they are the ones pursuing it, bringing new innovations to their schools and districts.
  4. They keep their long-range goals in mind. Tech-savvy teachers never do anything simply for technology’s sake. They can articulate exactly how a particular technology advances their goals.
  5. They use technology in their day-to-day lives. These teachers don’t leave their technology at work. They use it for everyday activities like shopping, banking, and making plans with friends.
  6. Their attitude towards technology is balanced. As much as they love technology, they also realize that it isn’t everything! Good technology does not automatically make a good teacher. Besides, everyone needs a break from technology sometimes.
  7. They use the Cloud to make their classrooms paperless. Handing out paper assignments in class? Collecting and grading huge piles of essays? These tasks are a thing of the past, as tech-savvy teachers use Cloud technology to assign, collect and grade student work.
  8. They collaborate. Tech-savvy teachers always want to share their ideas and learn from others. Their excitement and their thirst for knowledge are insatiable. They even collaborate with teachers in other parts of the globe.
  9. They are skilled in digital assessment. There are plenty of assessment apps out there, but tech-savvy teachers know exactly which of these apps best meet their learning objectives.
  10.  They use a variety of apps. Why stick to just one or two apps when so many exist that can enhance their teaching? Teachers will use different apps depending on their subject and the age of their students.

(taken from https://www.thetechedvocate.org/10-habits-tech-savvy-teachers/)

Λοιπόν… Περί QRC (Quick Response Code) ο λόγος!

Όταν τα Χριστούγεννα έψαχνα για μια πιο πρωτότυπη ευχή στους μαθητές / συναδέλφους μου έπεσα μπροστά σε ένα tutorial που συνιστούσε τη χρήση QR Codes για μια πιο προσωποποιημένη ευχή: η εκπαιδευτικός πρότεινε τη χρήση του για να απευθύνει σε κάθε μαθητή ξεχωριστά μια ξεχωριστή ευχή που ενσωμάτωσε με QRC στην κάρτα καθενός.

Μου φάνηκε διαφορετικό και challenging. Μέχρι τότε είχα δει να το χρησιμοποιούν οι κόρες μου αλλά δεν είχα προσέξει πόσο εύκολο ήταν. Νόμιζα ότι θέλει κάποια ιδιαίτερη εφαρμογή-και δεν είχα μπει στον κόπο να μάθω πώς.

Κακώς. Πολύ εύκολο. Τα περισσότερα κινητά το έχουν στη Σάρωση.

Και τα περισσότερα παιδιά πλέον έχουν smart phones, ακόμα και από τις μικρές τάξεις του δημοτικού! Στο σχολείο θα μπορούσαν να χρησιμοποιηθούν και tablets (ή του σχολείου ή και κάποιων μαθητών αν μπορούν να φέρουν).

Αν δεν υπάρχει σαρωτής στο κινητό ή το tablet μπορούμε να κατεβάσουμε μια εφαρμογή όπως το QR Code Reader:

https://play.google.com/store/apps/details?id=tw.mobileapp.qrcode.banner&hl=el&gl=EE

Αυτό βέβαια που ενδιαφέρει είναι πώς μπορούν να αξιοποιηθούν στην εκπαιδευτική διαδικασία. Παρακολουθώντας κάποια tutorials επέλεξα κάποιες ιδέες που θα μπορούσα να εφαρμόσω με τους μαθητές.

  1. Ενσωμάτωση σε φύλλα εργασίας (π.χ. αν θέλω να προσθέσω επιπλέον υλικό και πηγές)
  2. Ενσωμάτωση σε τεστ με συμβουλές βοήθειας για αυτούς που δυσκολεύονται ή με τις σωστές απαντήσεις για αυτοαξιολόγηση.
  3. Δημιουργία αφίσας με επιπλέον πληροφορίες σε διάφορα σημεία.
  4. Δημιουργία καρτελών για οδηγίες π.χ. σε μία συσκευή.
  5. Δημιουργία καρτελών για πληροφορίες για μία σημαντική προσωπικότητα (π.χ. στη βιβλιοθήκη του σχολείου για συγκεκριμένους συγγραφείς / βιβλία ή σε ένα μουσείο προσωπικοτήτων κάτω από την εικόνα του καθενός)

Οι δύο όμως επιλογές που έχουν μία πολύ μεγάλη δόση περιπέτειας και παιχνιδιού είναι οι εξής:

  1. Δημιουργία διαδραστικού χάρτη, όπου τα QR Codes παραπέμπουν σε χάρτες, βίντεο, σε Google Maps- Google Earth (κοιτάξτε εδώ ένα φανταστικό project: https://twitter.com/MrsTullio/status/1331765288346546178 )

(μήπως θα μπορούσε να γίνει ο treasure hunt map στο Unit 2 του Magic Book της Γ’ δημοτικού τέλειος έτσι??? Μια ιδέα λέω…)

  1. Κυνήγι θησαυρού ή Scavenger Hunt, όπου οι συμμετέχοντες αναζητούν μια λίστα από κρυμμένα στοιχεία (κάποια ή όλα σε QR codes) ή ερωτήσεις για να γίνει το παιχνίδι ακόμα πιο μυστήριο και διασκεδαστικό για τους μαθητές.

Ελπίζω οι σημειώσεις μου να βοηθήσουν κι εσάς!   🙂