This is a really interesting project I just found in another weblog, an American one.
I think it’s really nice to try it out. You can have fun making it AND save money!
If you make it, I’m looking forward to your comment!
Read the writer’s instructions carefully!
Miss L.
Monday, March 21, 2011
This is a project I remember doing from 6th grade art.
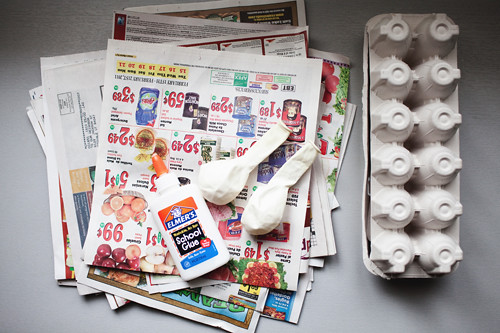
What you will need:
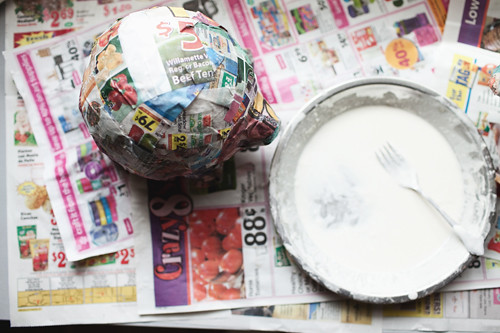
-newspaper. We don’t get the paper, so I saved all the ads for a few weeks–forget about the slippery magazine type pages, and just use the newspaper-ish ones.
-balloons
-an egg carton
-masking tape
-flour
-school glue
-tissue paper
-foam paint brush
-large corks
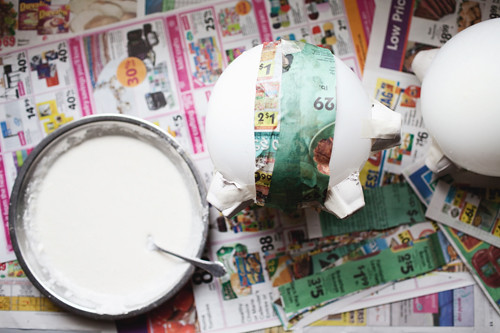
Day 1
Blow up balloon.
Cut 5 sections out of egg carton. Tape onto balloon as “legs” and a “nose” over the balloon tie.
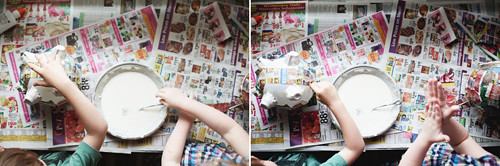
Mix flour and water to form a thin paste.
Cut newspaper into strips and put a thin coat of flour paste on each strip, and smooth it onto ballon.
Over and over and over. It’s messy and it’s fun.
Smooth down the pieces the best you can (the kids do it a bit sloppy but you’ll be able to go back and smooth it down)
After pig is covered in paper, set to dry over night.
*don’t do too many layers or it will take forever to dry.
*we added a few extra strips on the bottom since we’ll be cutting out a hole.
Day 2:
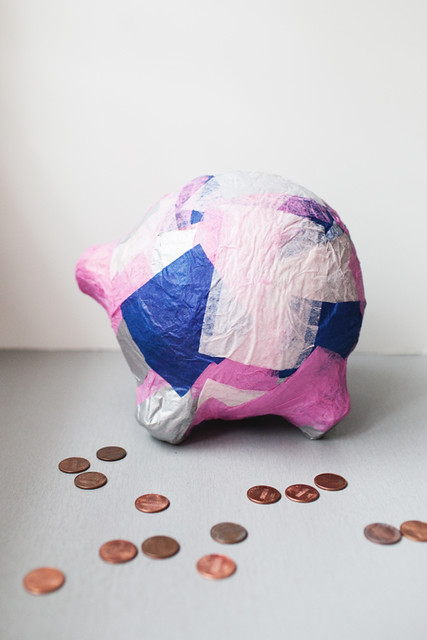
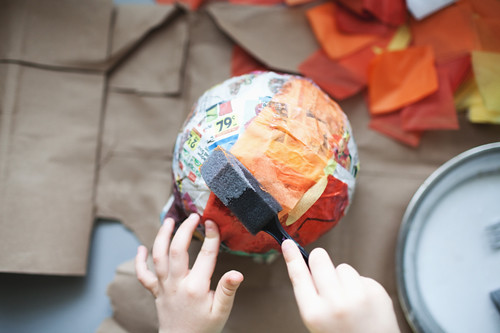
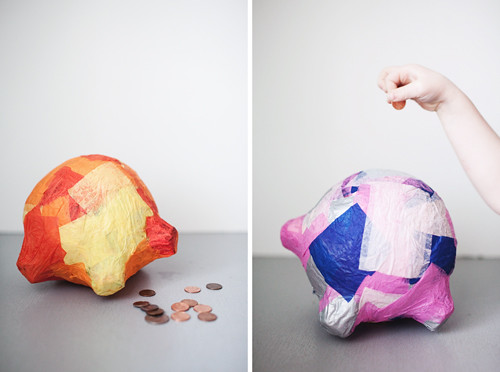
Decide on your colors. The boy wanted his pig to look like it was on fire.
The girl wanted hers to look like a princess.
Of course, and of course.
Cut tissue paper into smaller pieces–we did squares and rectangles.
Mix school glue and water to make a runny glue that can be “painted” on.
Glue tissue paper onto pig. (they’ll need help around the feet and nose)
This kids loved this part. They learned quickly that they needed to start out with darker colors, or several layers of lighter colors to cover the newsprint.
They also loved seeing how colors turned out when they combined tissue squares.
Allow to dry over night.
Day 3
Make sure pig is dry and hardened all the way around.
Cut a slit in the top, and a hole in the bottom.
You should be able to pull the balloon out of the bottom hole.
I cut a cork in half so it didn’t stick out too far.
load it up!
the end.
Sheena


